• Home
  • About Me
  • Policies
  • Work with Me
  • Guest Posting
Stuff Parents Need

Stuff Parents Need

Easing the chaos in the nest, one find at a time.

  • Style
  • Parenting
  • Giveaways
  • The Kitchen
  • DIY Projects
  • Fun Things To Do
  • My Favorite Finds

20 Recipes I REALLY Want to Try: 31 Days of Unforgettable Recipes

October 13, 2013 · by Tiffany Merritt · 3 Comments

I don’t know about you guys, but this 31 Days of Unforgettable Recipes is making me want to forget about my current pants size and just EAT. ALL. THE. THINGS. Nom nom nom! So much yummy…so little time.

Speaking of which, today I wanted to showcase some of the delicious finds that are simply languishing on my Pinterest boards (you are following me on Pinterest, right? The application process for being Pinterest besties is still wide open, so come on over!). What I have listed below is at the very top of my list of recipes I want to try in the near future (or at least it was before this series started…now that list is about 15 times as long!). Maybe some of you can beat me to trying out these recipes and let me know how they turned out!

recipes I want to try

Beverages

Orange Push Up Smoothie, Averie Cooks

Vodka Root Beer Floats, Minimalist Baker

Crazy Awesome Sangria, Mochachocolata Rita

 Appetizers

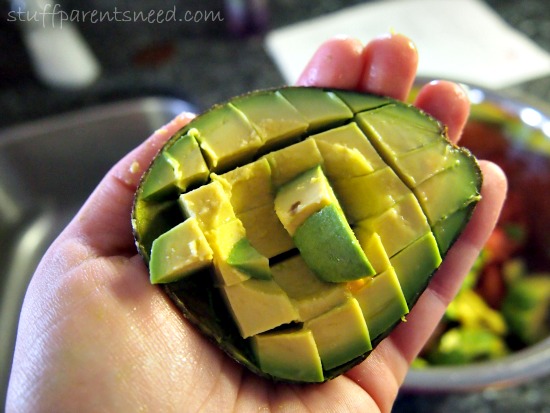
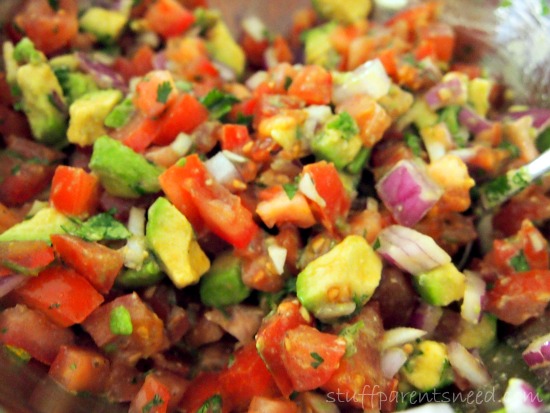
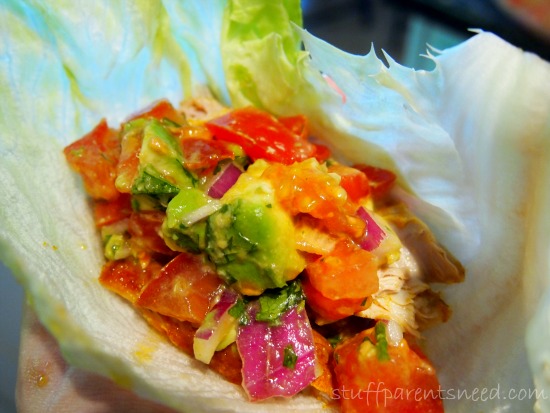
Asian Corn & Avocado Salsa, Scaling Back Blog

Mediterranean Layer Dip, Have Recipes Will Cook

Baked Butternut Squash Chips, A Couple Cooks

Pizza Dip, Closet Cooking

Sides

Crispy Sweet Potato Fries with Sriracha Dip, The Art of Doing Stuff

Black Bean, Corn and Edamame Salad with Cilantro and Lime Dressing, Tastefully Julie

Pineapple Fried Quinoa, Lunchbox Bunch

Main Dish

Steamed Pork and Summer Squash Dumplings, Adventures in Cooking

Penne with Roasted Asparagus and Balsamic Butter, Food and Wine

Chorizo and Sweet Potato Enchiladas, Budget Bytes

Slow Cooker Pork Tacos with Tomatillo Salsa, 365 Days of Slow Cooking

Balsamic Glazed Steak Rolls, Picture the Recipe

Squash and Sweet Potato Pancakes, Big Girl Small Kitchen

Dessert

Slow Cooker Moist Chocolate & Caramel Cake

S’mores Shake, Bombshell Bling

Chocolate Peanut Butter Buckeye Cake, Buns in My Oven

Pecan Pie Cake, Sweet Jeanette

Anything on your “must try” list? Send me a link! 

Want to see the entire 31 Days of Unforgettable Recipes series? Just click the banner below to see the full list!

31 days of unforgettable recipes


Filed Under: The Kitchen · Tagged: #31days, must try recipes, pinterest, recipes

How to Remove Rust (DIY)

June 16, 2013 · by Tiffany Merritt · Leave a Comment

The girls have one of those silver dinner bells that you can find at most any tourist destination in their stash of tub toys. It makes a fun sound underwater and it gets on mom’s nerves, which means it is the PERFECT thing to play with!

Trouble is, silver bells and constant exposure to water don’t really mix well, and the end result is rust. But rather than have to sink another $5 into a bell I can’t stand, I thought I’d take a crack at fixing the one we already own and hate love.

how to remove rust. diy rust remover

The process is really quite simple! What you need is some lemon juice and some Borax Laundry Booster. If you don’t already have some of this in your laundry room, I most definitely recommend that you get some! This is a product that is a serious work horse in our house. It does a bajillion different things! One of which is to help remove rust, so let’s get crackin’ on that project, shall we?

Ok, do you have your lemon juice and Borax ready? Simply combine equal parts lemon juice and Borax to make a paste. Since my project was small, I used 2 Tbsp of each, and probably could have gotten away with half that amount.

DIY rust remover


Apply the paste to rusted areas and allow to sit for 30 minutes.

how to remove rust

Next, take a cloth (I used a cotton dish rag) and wipe the rusted areas. I went back and forth over it a few times and saw these results:

how to remove rust


how to remove rust

While it didn’t remove every little bit of rust, I also had a strangely shaped object that made it difficult for every piece to “soak” in the mixture for the 30 minute timeframe. I think the results are pretty great, actually, and I’ll definitely use this again the next time I have to bring some object back from the depths of rusted despair. Pretty neat trick, huh? Super cheap. Super easy. All thanks to Borax!

Don’t forget to pin this post on your Pinterest board of DIY tips and tricks! 

I received a complimentary box of Borax through the Purex Insiders program in exchange for my honest opinions. I was previously a fan of Borax and would recommend it to anyone! This post contains an affiliate link. 

Filed Under: DIY Projects · Tagged: borax laundry, borax laundry booster, how to remove rust, lemon juice, pinterest, remove rust, removing rust, removing rust from metal, rust removers, what removes rust

Fourth of July Recipe Round Up: Simple Breakfasts

June 13, 2013 · by Tiffany Merritt · 4 Comments

We’re just a few weeks away from the Fourth of July. Based on the Pinterest influx of all things red, white and blue, I’m guessing that many of you are already starting to make plans for Independence Day, especially as it relates to what you’ll be eating that day.

I’ve been doing exactly the same thing, only I’ve been focused on the most important meal of the day: breakfast!

And ok, let’s be real: I may run out of steam by about 10am on the Fourth of July (much like any other day), so breakfast is really the only meal I can guarantee to put some effort into. Ha!

I’ve put together a list of some of my favorite SIMPLE Fourth of July recipes for breakfast. I hope you find a few you love!

fourth of july recipes: breakfast ideas

1. Red, white and blue parfait. I made this last week and it was a hit all around. Everyone loved how it tasted, and I loved how effortless it was. Simply layer sliced strawberries, vanilla yogurt, blueberries, and a dollop of whipped topping. Done!

fourth of july recipes: breakfast parfait

2. Watermelon star platter

3. Patriotic oatmeal

4. Red, white and blueberry muffins

5. Strawberry-blueberry tapioca parfaits

What are you going to cook up this Fourth of July? Please share your ideas!


Filed Under: The Kitchen · Tagged: 4th of july breakfast ideas, breakfast recipes, easy recipes, fourth of july breakfast, fourth of july breakfast recipes, pinterest, recipe

Colored Rice Activity: Simple and Very Entertaining!

June 8, 2013 · by Tiffany Merritt · 4 Comments

I’ve said it a million times before, and I’ll say it a million times again: thank goodness for Pinterest! It is a treasure trove of great ideas for pretty much everything, including simple and fun activities to do with your kids. Since I’m not creative or crafty, I need all the help I can get to find summer projects for my girls that are fun and educational, and that don’t push me past my creative abilities (my limit in that regard is VERY low, by the way).

About two weeks ago, I embarked on a project to make colored rice, or rainbow rice. I found the rainbow rice project here. Please do go check out this great blog post to see the inspiration behind my work! It certainly looked beautiful and after reading the instructions, I realized that it didn’t sound terribly difficult, especially if I made a few modifications. So off we set!

Here’s what you will need to make rainbow rice (and by the way, I found the rice and the food coloring at The Dollar Tree…cheap thrills! The vinegar was also very cheap at my local grocery store).

ingredients needed to make colored rice

In a glass bowl, place one cup of rice, 3 drops of food coloring and 1/2 tsp vinegar. Cover the bowl with aluminum foil (I chose this over the lid that came with my bowl just in case the food coloring caused staining). Shake it up like crazy!

shaking rice in a bowl to make colored rice

The original instructions recommended letting the rice sit out in the sun for the rest of the day to dry. Darah was ready to play NOW so I needed to speed things up. I got out some parchment paper and placed it on a baking sheet. Then I spread out my newly colored rice and let is dry out in the oven, set to 200 degrees, for 20 minutes. This was the perfect amount of time and the perfect temperature, as it turned out!

baking colored rice to dry it out


I repeated the process for 4 different colors (red, blue, green and yellow), so it did take 1 1/2 hours to get all of the rice made, though the majority of that time was spent waiting for each color of rice to dry out. You could speed up the process by making two colors at once and utilizing both shelves of your oven. Why didn’t I do that? Simple: because I wasn’t wearing my thinking cap that day!

After your rice is all finished, you can make a pretty presentation to your kids. This definitely got some oohs and ahhs from Darah!

4 colors of colored rice or rainbow rice

Now it was time for the moment we’d all been waiting for: mixing up the colors! I gave Darah a spoon and let her go to work. She was positively giddy!

how to make colored rice

Here she goes!

mixing up colored rice

Darah played and played and played with her colored rice (probably for 45 minutes…3 eternities for a 3 year old). And we now have it sitting on a shelf in a glass jar for easy access. We get it out every couple of days and she spends a lot of time hiding treasures in the rice and pretending that it is where mermaids live. It is a fantastic sensory activity and promotes imaginative play. All this from a bag of rice, a few drops of food color and some vinegar. This activity totally rocks!

how to make colored rice

Let me know if you try out the colored rice activity! And if you love the idea, please share it with your friends (buttons over to the left!) via Facebook or Pinterest!

Filed Under: DIY Projects · Tagged: cheap activity, colored rice, colored rice art, colored rice for kids, colored rice projects, making colored rice, making rainbow rice, pinterest, rainbow rice

Using Turmeric to Spice Up a Paleo Dinner (Pinterest Giveaway!!!)

May 7, 2013 · by Tiffany Merritt · 19 Comments

So I’ve mentioned a few times before that Tim and I are eating “mostly” Paleo these days. We’ve cut out dairy, soy, legumes, carbs, grains and sugar.

That sounds pretty terrible, am I right?

But in practice, it isn’t so bad (except for breakfast…breakfast is admittedly really tough). And I feel significantly better, physically, which was the main goal of cutting out some of those products. My sugar intake pre-Paleo was out of control, people. I had to cut it out cold turkey!

One of the cuisines that is a bit challenging for folks on Paleo is anything Mexican. Cheese, beans and tortillas are all off the table. But that doesn’t mean that you can’t still be inspired by the great flavors. In fact, I recently put together some tacos that not only had a lot of influence from Mexican dishes, but also gave a nod to Indian cuisine. It was a global fusion fiesta, right in my kitchen! 🙂

mccormick turmeric spiced latin indian dish

I used McCormick products to add spice to my dish. Here’s exactly what I put in my dish:

McCormick spices turmeric

And here’s the recipe I used, largely the same as this recipe on the McCormick site, with a few tweaks to make it Paleo-friendly.

Turmeric Spiced Chicken with Tomato Avocado Salsa

Prep Time: 15 minutes

Cook Time: 16 minutes

Step 1:

2 tbsp olive oil

1 tsp McCormick Garlic Powder

1 tsp McCormick Gourmet Collection Sicilian Sea Salt

1 tsp McCormick Ground Turmeric

1/2 tsp McCormick Chiptole Chile Pepper (can substitute crushed red pepper, as well)

2 pounds chicken thighs

Step 2:

6 medium vine-ripened tomatoes, cut into small chunks

2 avocadoes, peeled and cut into 1/2 inch chunks

1/2 cup coarsely chopped red onion

1/4 cup chopped fresh cilantro (splurge for the fresh stuff…totally worth it!)

2 tbsp lime juice

1 tsp McCormick Gourmet Colelction Sicilian Sea Salt

1/2 tsp McCormick Ground Turmeric

8 large iceburg lettuce leaves to serve as the “tortillas”

Mix together all the spices and oil found in step one. It should look like this:

McCormick spices

Then place your chicken thighs in a large resealable plastic bag and add the marinade to it. Give it a good squish in the bag to make sure all the chicken is coated well. Refrigerate at least 30 minutes (I let it sit for about 3 hours).

To make the salsa, chop up your onion, tomatoes and cilantro to your liking. To chop up an avocado easily, run a butter knife through it several times. It should look like this:

how to slice an avocado into chunks

It will easily go right into your bowl if you just run your knife or a fork all along the edges of the avocado. Easy!

Your salsa also needs to get the lime juice and the spices at this point. It should look like this when you are finished:

salsa using McCormick spices

Muy bonito, no? 🙂

Now it is time to grill up your chicken! I take the lazy route when it comes to grilling and just plug in my George Foreman! I was able to fit 5 chicken thighs on my machine at once (with a little creative arranging!). Look at how the turmeric has colored the chicken. So pretty!

McCormick turmeric spice on chicken

After your chicken is done (I’d give it anywhere from 14-18 minutes…no pink should be left!), let it cool and then chop it to your liking. Now it is time to build your tacos! This is what the finished product looked like for us:

McCormick turmeric spiced chicken tacos

I was still in the kitchen when I ate my first one. Tim asked me how they tasted and I didn’t answer him at all until I was completely finished. I seriously didn’t want to stop eating for the few seconds it would have taken me to respond to him! Yeah, they were THAT good!

The turmeric spice adds a whole new dimension to taco night. I will be making this regularly. I honestly didn’t even miss beans, chesse and tortillas, which all would have been necessisities for us on taco night just a month ago.

Pinterest Challenge!

Are you in the mood to spice up your dinner routine? Perhaps try something just a little different for your next taco night? Check out the McCormick Pinterest page for lots of great ideas to get you started! And right now McCormick has a great Pinterest Challenge going on with 30 spice kits up for grabs for the winners! See below for all the details!

Pinterest Taco Night

The challenge goes until May 31st, so do yourself a favor and get to pinning! I hope you will repin my delicious Paleo-friendly fusion tacos, too! They are simply divine!!! 🙂
Good luck, everyone!
This post was written in collaboration with The Motherhood. I have been compensated for my time in writing this post and creating this recipe. All thoughts and opinions expressed here are strictly my own. 

Filed Under: The Kitchen · Tagged: avocado tomato salsa recipe, giveaway, mccormick, mccormick spices, mccormick turmeric, paleo, paleo diet turmeric spice, paleo mexican, paleo recipes, pinterest, recipe, turmeric, turmeric recipes, turmeric spiced chicken with tomato avocado salsa

How Do I Get Followers on Pinterest?

April 11, 2013 · by Tiffany Merritt · 36 Comments

Are you on Pinterest? The odds are good that you are! Pinterest surpasses Facebook and Twitter and Google searches for ways that people find my site. I know Pinterest has helped me to find tons of great blogs. And tons of great ideas. If you are on Pinterest, I hope you will leave a link to your Pinterest URL in the comments so I can be sure to follow you. And I hope you will follow me!

Part of the fun of Pinterest is following people who pin awesome stuff. Perhaps you pin awesome stuff, yourself, but you are left wondering how to get more people to follow you. I know bloggers are always asking the question, “How do I get followers on Pinterest?”

Today I’d like to show you one of the ways I’m having success getting QUALITY followers, and a way that I’m finding quality people to follow back.

  how to get  followers on pinterest

For the past two weeks I have been using PinWoot.com, and I have seen a steady climb in my Pinterest followers! PinWoot is an online resource that brings together pinners who wish to increase their followings. For that reason alone, I believe the overall pool of folks on PinWoot is high quality. There are all individuals and bloggers who want to attract more followers, and that means that they take Pinterest seriously.

PinWoot.com is absolutely free to us. When you sign up, you are given a certain number of “seeds.” Those seeds are what you offer to others in exchange for following you on Pinterest (following for seeds takes place right on the PinWoot website, which makes it extremely easy). You can decide if you want to offer potential followers anywhere from 1-5 seeds for following you. I am currently offering 3 seeds and seeing steady traffic, though I have also experimented with offering as few as 2 and as many as 4.

When I find myself low on seeds, I just go earn some more by following others on the site. You can click on the pinners’ links to check out their Pinterest pages before agreeing to follow them, or you can just make a decision based on the types of things that they list as interests in PinWoot.

Using PinWoot.com takes me no more than 3 minutes every day, and as a result I have gained some terrific new followers and found some terrific new accounts to follow. Everybody wins!

Please sign up for PinWoot if you are looking for ways to get more followers on Pinterest. I think you will be really pleased with the quantity AND quality you get from PinWoot! And don’t forget to leave your Pinterest url in the comments so I can follow you!

If you sign up for PinWoot using my affiliate links above, I get extra seeds. No money. Just extra juice to earn more followers. PinWoot.com did not sponsor this post. 

Filed Under: General · Tagged: get pinterest followers, how can i get more followers, more followers on pinterest, pinterest, pinterest followers

Easy Mason Jar DIY: Parmesan Cheese Container!

October 24, 2012 · by Tiffany Merritt · 3 Comments

I have a very simple DIY project for you today. Let me first say that I did NOT come up with this idea on my own! I found it on Pinterest (of course!). I found the idea here, but there are several different bloggers who have posted this idea, so I can’t say with certainty who blogged about it first!

If you have a plastic container of Parmesan cheese in your fridge AND you have a mason jar handy, then you can reduce some of your plastic and ugly packaging in your fridge and replace it with something much more lovely in about 30 seconds.

The lid of the Parmesan container will screw onto the mason jar. Oh heck yes it will! This morning I took a very small amount of time and finally transferred my cheese from that ugly plastic container to the super cute mason jar. I love it!

I know it isn’t a major project that completely changes the aesthetic of my home, or anything, but it’s a little win for beauty. And some days, you really need a little win!

Have you done any great Pinterest projects, lately?

Filed Under: General · Tagged: diy, diy parmesan cheese jar, glass containers, glass jars, mason jar, mason jar ideas, parmesan cheese jar, parmesan cheese shakers, pinterest

Oransi Ionic Fridge Air Purifier: Pin it to Win it!

September 11, 2012 · by Tiffany Merritt · Leave a Comment

You have probably received the advice before to put an open box of baking soda in your fridge to help keep odors at bay. I know I have tried this method several times, and I always end up with the same result, which is baking soda spilled all over my fridge due to the box getting knocked over. This is problematic for me because I’m the type of person who puts off cleaning out her fridge for as long as possible (hence needing some help deodorizing it!).

Oransi is a company who has come up with a much better solution, in my opinion, to baking soda. It’s the Oransi Ionic Fridge Air Purifier and it does NOT mask odors in the fridge. Rather, it kills bacteria that is forming, prevents mildew, sterilizes the fridge once every hour or so and neutralizes stale and foul odors. So basically, it takes whatever is causing your fridge to smell less-than-pleasant and annihilates it!

The Ionic Fridge Air Purifier is a compact machine that can easily get tucked into a fridge (even a really full one like mine). It runs very quietly (it’s on for about 5 minutes out of every 2 hours) and uses 2 AA batteries. They will need to be replaced after about 90 days (I highly recommend rechargeable batteries!). As for remembering when to replace the batteries, just replace them when you replace your water pitcher filter. That makes it easy!

This machine is definitely making a difference in my fridge. It’s not unusual for me to have leftovers of salmon, two or three wedges of cheese, and some fresh cabbage all sitting on the same shelf. So you can imagine the hard work this product has to do. And it’s working!!!

Win it!: Here’s your chance to win your own Oransi Ionic Fridge Air Purifier! This giveaway is a bit different, because this is a Pin it to Win it contest. Ready? Set? Go!

a Rafflecopter giveaway

Be sure to enter my other current giveaways, found on the sidebar of my page.

Disclosure: I received a complimentary product for review purposes. All thoughts and opinions expressed here are strictly my own.

Filed Under: Giveaways · Tagged: air purifier ionizer, air purifiers reviews, fridge air purifier, giveaway, ionic air purifier, ionic air purifiers, oransi air purifier, oransi air purifiers, oransi ionic fridge air purifier oransi, oransi review, pin it to win it, pinterest, review

Bumper-Free Bedding for Baby #2 (and a Pinterest Contest!)

April 9, 2012 · by Tiffany Merritt · 2 Comments

I absolutely adore the bedding set I picked out for Darah. I spent HOURS pouring over different options, trying to find good deals, and eventually going back to a set I fell in love with during the first 30 minutes of my epic quest. It was a splurge, but I didn’t care. I never regretted that purchase for a second. You can find an image of it on my Pinterest board if you are super curious!

The set did come with a bumper. And yeah, I had heard some rumblings and mumblings about how bumpers were no longer considered to be all that safe. But to be honest with you, I dismissed them, figuring that generations of babies had done just fine with bumpers in their cribs. Plus, it was so darn cute!

And then the American Academy of Pediatrics decided to weigh in on the issue. They officially came out against crib bumpers. And that’s when I finally got my head out of the sand and started paying attention.

HALO, the fabulous brand behind the super smart and super safe SleepSacks, has risen to the challenge of creating worry-free bedding by creating the Safe Sleep Crib Set, which is designed to create a safe sleep environment for babies (and a cute one, too!).

The five-piece set has everything your baby needs for a healthy and happy night of rest. It consists of the following:

  • HALO SleepSack wearable blanket
  • SleepSack Swaddle
  • Two coordinating crib sheets in soft cotton jersey
  • matching crib skirt
What I really love about this bedding set is that it goes beyond what might look cute and provides you with exactly what the baby needs for sleep, leaving out all the accessories like bumpers and quilts that can actually pose a breathing threat to babies. With our old set, I knew the quilt shouldn’t go in the crib and only used it as a decoration, hanging above the crib like a tapestry. But how many other parents opted to put it inside the crib as a blanket for their infants? I love that this set comes with a SleepSack and SleepSack Swaddle to provide plenty of coverage for baby, with no risk of any fabric getting in their face.
You can find the HALO Safe Sleep Crib sets now on Amazon as well as Babiesrus.com. The sets retail for $109.99 but are on sale currently at both sites! It is available in six different patterns including pink, blue and neutral tones. We have picked out the Caroline’s Garden Set (below). Adorable, no?
Would you like to win a set for yourself? Well, it’s not so hard to do if you are on Pinterest (and if you aren’t on Pinterest….GET ON THERE, NOW! YOU ARE MISSING OUT!). HALO is sponsoring a “Pin It to Win It” contest. Click here for all the details on how you can win your own set. The contest ends on April 15th, so hop on over now and get entered!
If you’d like to stay up to date with all the HALO happenings, follow them on Facebook, Pinterest, and Twitter!
Disclosure: I received a complimentary safe sleep set for review purposes. All thoughts and opinions expressed here are strictly my own. 

Filed Under: Featured, Parenting Tips · Tagged: baby nursery bedding, bumper free crib bedding, bumper-free bedding, crib bumper, Halo, halo bedding, halo bedding set, halo sleep sack, nursery bedding, nursery bedding sets, pinterest, pinterest contest, review, Safe Sleep Crib Set, sleep sack, sleepsack

  • 1
  • 2
  • Next Page »

Connect

  • Email
  • Facebook
  • Instagram
  • Pinterest
  • Twitter

Welcome!


Grab your beverage of choice (mine is iced coffee) and let's hang out for a spell! I'm Tiffany, and I've rambunctious little girls and a fierce desire to share any tip and trick I can find to make lives with little ones a bit less hectic and a lot more fun. [Read more...]

Popular Posts

Keep Slowing Down. You’ve Got a Race to Lose

Keep Slowing Down. You’ve Got a Race to Lose

Free Summer School for Moms (You’ll Love It!)

Free Summer School for Moms (You’ll Love It!)

The Best Cheap Mattress is Also The Best Quality Mattress: A Must-Read

The Best Cheap Mattress is Also The Best Quality Mattress: A Must-Read

25+ Moana-Inspired Easter Basket Ideas

25+ Moana-Inspired Easter Basket Ideas

The Book Every Child Should Own (And How to Get a Free Copy )

The Book Every Child Should Own (And How to Get a Free Copy )

Recent Posts

  • 7 Reasons Why Peel And Stick Wallpaper Will Become Your New Obsession
  • Exploring Portugal’s Charm: Iconic Cities and Scenic Train Journeys
  • Discover Scandinavia: The Best Vacation Packages in Norway and Sweden
  • Interior Design Transformation Done Right: Scaling Up, Blending Styles, and Telling a Story
  • Educational Resources Every Parent Should Know About

Search

Sponsors

Copyright © 2025 | Innovative by The Pixelista | Built on the Genesis Framework