• Home
  • About Me
  • Policies
  • Work with Me
  • Guest Posting
Stuff Parents Need

Stuff Parents Need

Easing the chaos in the nest, one find at a time.

  • Style
  • Parenting
  • Giveaways
  • The Kitchen
  • DIY Projects
  • Fun Things To Do
  • My Favorite Finds

How to Remove Crayon From Plastic: The Fast Tip You Have Been Looking For!

March 4, 2014 · by Tiffany Merritt · 5 Comments

So the other day I found myself having to Google, “How to remove crayon from plastic” because, you know, Layah decided to color her VTech laptop keyboard red.

Awesome. 

how to remove crayon from plastic

I found several different options, most of which involved soaking the colored-on section in something else. Since I was dealing with plastic that happened to also be an electronic, this wouldn’t do. But I eventually found something that I thought could work with the help of a Q-Tip. Here’s what I did for those of you with little ones who are sure to color on something other than a coloring book in the future!

how to remove crayon from plastic


You will need baking soda, a tiny little bowl, a few drops of water, and some Q-tips.

Make a paste with the baking soda, and keep it really on the dry side…just barely moist. Like this:

how to remove crayon from plastic 2

Now dab some of your paste onto a Q-tip, and very carefully wipe down the colored on area. It should come up fairly easily.

how to remove crayon from plastic 3

With just a bit of elbow grease and the use of how ever many Q-tips it takes (for me it was just 2), you should have a crayon-free surface in just a few minutes.

how to remove crayon from plastic 4

If you have a young child at home, then you might also want to bookmark or pin my other “how to remove” posts, such as how to remove permanent marker from glass, and how to remove permanent marker from skin.

Let me know if this technique works for you, or if you run into any trouble or have any other suggestions for how to remove crayon from plastic!
Filed Under: DIY Projects · Tagged: baking soda cleaner, baking soda uses, how to remove crayon, how to remove crayon from plastic

Putting Easter Candy to Work as a Centerpiece (Giveaway!)

March 4, 2014 · by Tiffany Merritt · 107 Comments

I received product from HERSHEY’S and a stipend from Global Influence for this post. All thoughts and opinions listed here are my own, as always. 

I don’t know about you, but my 4-year-old started asking for us to decorate for Easter the day after Valentine’s Day. I gently reminded her that she was forgetting St. Patrick’s Day, and all things green and gold. That appeased her until last week, when she INSISTED that we start putting some bunnies out on display.

For some moms, the thought of decorating for each season puts a twinkle in their eyes, and a spring in their step. Crafts and all things creative all their element.

Not so for me. I never really decorated much for any season except for Christmas before I had kids, but seeing how excited they get about putting out knick knacks leaves me feeling as though I should be doing SOMETHING. But after just 5 minutes on Pinterest searching for Easter crafts, I start to feel overwhelmed and WAY out of my comfort zone.

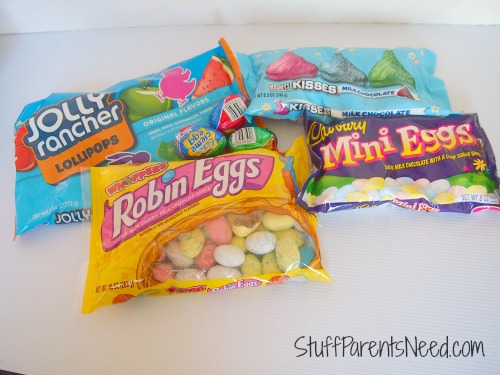
But you know what? It really doesn’t have to be that way! HERSHEY’S recently sent me some of their Easter candy options, and it occurred to me that I could do some very practical decorating, by making use of some of the candy I would be buying, anyway for Easter baskets. Instead of spending a ton of money on craft supplies that might or might not get used, and that will definitely cause me stress and anxiety, I could just buy candy. Buying in a bulk is a great way to make your dollars stretch even further.

Sounds like a plan! 

hershey's easter candy craft 1

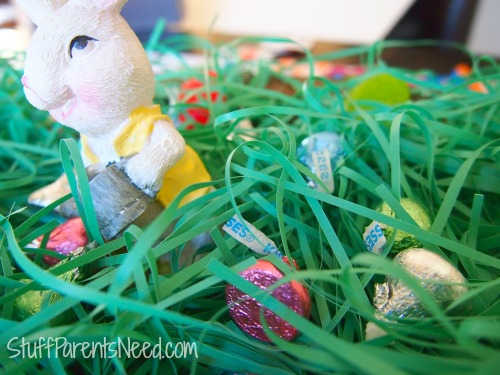
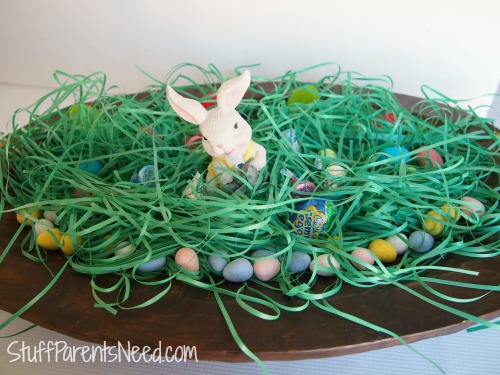
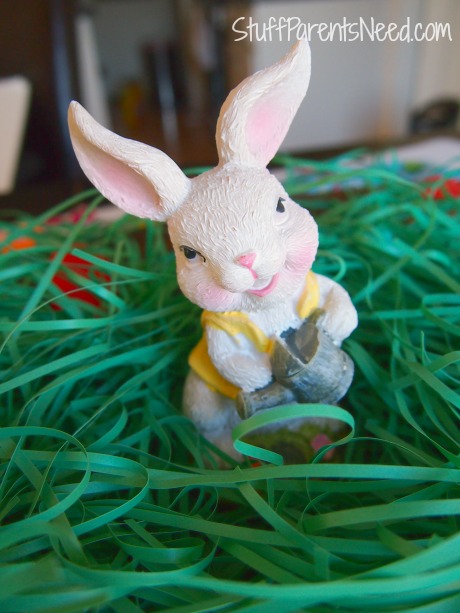
So here’s how I created a cute centerpiece just by using the candy I would have already purchased, plus $3 in other supplies. I went to the Dollar Tree and spent $2 on 2 bags of the grass that looks more like paper than plastic. I only had to buy 2 bags because each bag came with 3 different colors, and I only wanted to use green. So if you’d like to use more than 1 color, you’ll probably only need 1 bag. I also spent $1 on a bunny figurine to stick in the middle of the display. And I had a pretty wooden bowl on hand, already. You could use any sort of tray to make this display, or you could even create it on a mantel or shelf without a container.

hershey's easter candy craft 2

All of the candy you see came from bags that I would have purchased anyway for filling Easter baskets. This idea can put some of it to use ahead of time, and the candy you don’t use for the display can just get tucked away in your closet until the Easter bunny needs it!

hershey's easter candy craft 3

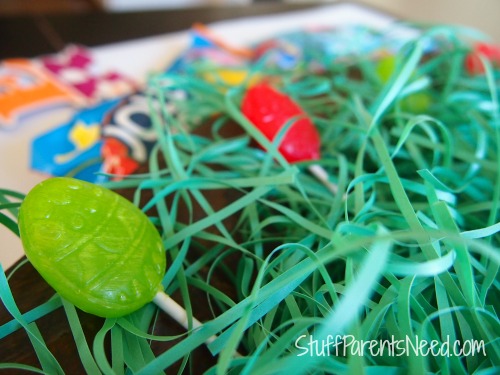
After I placed the grass in the container, I added JOLLY RANCHER Hard Candy lollipops. They have a bag with an Easter theme, and I picked out the Easter egg designs to go in the back.

hershey's easter candy craft 4

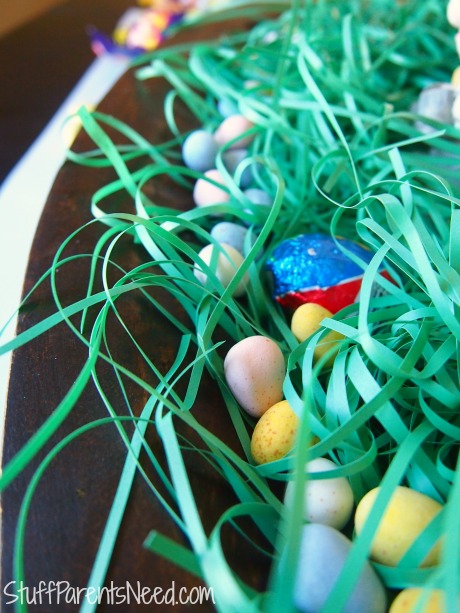
Then I placed the CADBURY Mini Eggs along the front, as well as a Cadbury Egg, as if it were hidden in the grass.

hershey's easter candy craft 5

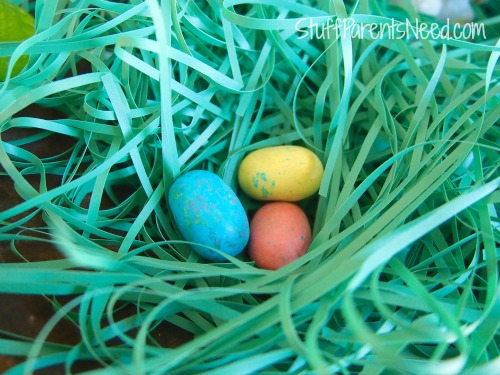
I took the larger WHOPPERS ROBIN EGGS and put one on each side of the display, made to look like little bird nests. So cute!

hershey's easter candy craft 6

Finally, I sprinkled some HERSHEY’S KISSES Milk Chocolates around the area where the bunny was doing his watering. I thought it was cute to make it look like he was growing an Easter candy garden.

hershey's easter candy craft 7

So there you have it: a very affordable, very resourceful Easter decoration idea that even the craft-challenged can create! This is also a fun one to have the kids help with; they can create whatever type of “candy garden” they want!

And I certainly can’t say that I’m dreading when the time comes to “clean up” and “put away” this display. I just hope it makes it to Easter! The kids will actually withhold from eating it; it’s me I’m worried about!

Win it!: I’m excited to be giving away an assortment of HERSHEY’S candy products, like what you see featured above!

Be sure to enter my other current giveaways, found on the sidebar of my page.
a Rafflecopter giveaway

Filed Under: DIY Projects, Popular Post · Tagged: candy, easter candy, easter candy centerpiece, easter candy ideas, giveaway, hershey, hershey's, hersheys easter candy

Chocolate Mint Brownies (You. Will. Die!!!)

March 3, 2014 · by Tiffany Merritt · 7 Comments

So my neighborhood swanky grocery store has had what they call an Andes Mint Brownie on display for the past month. It is approximately the size of my face. So naturally, I bought one when nobody else was around so that I wouldn’t have to share. What with it being so tiny, and all.

And OMG, I wanted to marry that brownie! It was heaven! So I determined that I should make some chocolate mint brownies at home so that I could have a whole pan of this goodness, and not just 1/3 of a pan (seriously, guys, those brownies were super-sized and then some…). These are perfect for St. Patrick’s Day or for Easter celebrations. Or you could just make them on a Tuesday. No judgment here.


chocolate mint brownies

I used the Betty Crocker Recipe as my guide, and did make a few modifications. Be sure to check out the original and decide how you’d like to proceed!

The recipe has 3 parts: a base, a filling, and a topping. Each layer requires a bit of time to cool down or set, so don’t get this started 30 minutes before dinner! Here are the ingredients:

base:

  • 1 box brownie mix (you will make this according to package directions).

filling:

  • 5 cups powdered sugar (I know!!!)
  • 6 tbsp butter, softened
  • 6 Tbsp whipping cream
  • 4 oz cream cheese, softened
  • 1/2 tsp mint extract
  • 4 drops green food coloring

topping:

  • 1/3 cup whipping cream
  • 1 1/2 cups semisweet chocolate chips
  • 1/3 cup butter

chocolate mint brownies stacked

Directions

  • Heat oven to 350°F. Grease bottom only of 9 x 13 inch square pan  or line it with Reynolds pan lining paper. (For easier cutting, Make and bake brownie mix as directed on box. Cool completely, about 1 1/2 hours (I made the brownies in the evening, and then let them cool overnight).
  • In large bowl, beat filling ingredients with electric mixer on medium speed until smooth. Spread over cooled brownies. Refrigerate until set, about 2 hours.
  • Meanwhile, in 2-quart nonstick saucepan, heat topping ingredients over medium-low heat, stirring constantly, until melted and smooth. Cool about 10 minutes.
  • Pour topping over filling; spread to cover. Refrigerate uncovered about 2 hours or until set. Before cutting into bars, let stand 10 minutes at room temperature. Store covered in refrigerator.

These are VERY sweet, so if you have more than your family can eat in a reasonable amount of time, just freeze the rest!

chocolate mint brownies

Filed Under: Popular Post, The Kitchen · Tagged: chocolate brownie recipe, chocolate mint brownie recipe, chocolate mint brownies, mint brownie recipe, mint brownies, mint brownies recipe, recipes

Why We Dance Every Day: Girls Dancewear Find

March 1, 2014 · by Tiffany Merritt · 1 Comment

Special thanks to CostumeSuperCenter.com for providing the dance costume for review. All thoughts and opinions expressed here are my own, as always. 

Every single parent has experienced the tension between playing with your kids and getting some much-needed housework done. I’m not talking about general upkeep stuff. I’m talking about, “If I don’t get these dishes washed we won’t have anything to eat on for dinner” or “If I don’t do a load of laundry, the kids will be wearing their birthday suits to school tomorrow.”

When I find myself in that situation (pretty much daily), I almost always turn on some really fun music (like my Disney Pandora channel) and let the girls start singing and dancing. I will join them for a few dance moves, and then dance back over to whatever chore I’m working on. It feels more seamless to the girls for me to be singing along even if I’m not right next to them, and to have me there every few minutes dancing beside them. It also gives me a little boost of energy and seems to help me work faster.

dance costume toddler 1

Putting on some music is nearly effortless for me, and the girls just love it. There are many great benefits to dancing, and I feel good about the exercise they are getting by running around in circles and leaping through the air (or hopping, in Layah’s case). Dancing also seems to be the activity that causes the least amount of frustration between the two girls; they play beautifully together when they are dancing!

I do keep a rather full costume box so that the girls can play dress up during their dancing sessions. Layah has been having to make do with her sister’s costumes that are too big for her, but now she has her own dance costume. And she adores it! While it doesn’t look a thing like Elsa’s outfit from Frozen, she still believes that she is Elsa when she puts it on, and she sings, “Let it Go!” at the top of her lungs while she twirls around. She even does the “throw off your crown” move!

dancing to let it go

So what about you? Do you ever think to just turn on some music and let the kids sing and dance around the house for a little while? And do your kids like to play dress up any time they are putting on a show? We run the gamut here, from Pink Swan Princess to super hero, and sometimes both at the same time. All set to music. And I always take a moment to look up from my chores and watch my girls loving life and just being kids. It’s one of the most beautiful parts of my day.

toddler dance costume

Filed Under: Parenting · Tagged: buy costumes, costume super center, costume supercenter, costume supercenter review, costumesupercenter.com, dance costume, dance costumes, dance costumes for kids, kids dance costumes, review

10 Striped Tops I Love, $20 or Less!

February 28, 2014 · by Tiffany Merritt · 1 Comment

I’m itching for some new clothes now that the temps are thawing out. And I’m searching for some stripes this spring! Thought I’d share some of my favorite finds that are $20 or less! Yay sales! (Affiliate links included).

spring stripes

Lucky Brand Jeans Stripe Top, $7.19

Chaps Striped Top, $4.05

Ralph Lauren Shimmer Stripe Top, $12.51

Lucky Brand Chevron Striped Top, $14.29

3/4 Scoop Neck Top, $14.99

3/4 Sleeve Faux Leather Stripe, $16.05

Ralph Lauren Long-Sleeve Striped Jersey Tee, $19.23

Planet Gold Juniors Top, $6.20

Croft & Barrow Striped Tee, $5.99

Hang Ten Striped Top, $4.80


What are you shopping for this spring??? I’d love to hear! 

Filed Under: Style · Tagged: cheap striped tops, spring, spring striped tops, spring style, striped tops

Simple Hairstyle for Girls: Infinity Ponytail

February 27, 2014 · by Tiffany Merritt · 1 Comment

Just wanted to share a video with you lovelies today. It’s another hairstyle that I can actually do for my daughter (I have no hair styling skills…).


I got the idea here.


Here’s a video tutorial for the infinity ponytail!

Filed Under: DIY Projects, Style · Tagged: cute and easy hairstyles, cute easy hairstyles, hairstyles for girls, infinity ponytail, ponytails, simple cute hairstyles, simple hairstyle for girls, simple hairstyles for girls

Honest Company Conditioning Mist Review: An Honest Assessment

February 26, 2014 · by Tiffany Merritt · 3 Comments

This is the third item from The Honest Company that I’ve reviewed recently. Please do take a moment to check out my other Honest Company reviews if you are new to The Honest Company and want to learn more about which products to buy and which ones to avoid. I also clue you in on how to get a bunch of stuff free if you are a new customer!

honest-company-conditioning-mist

Simply put, we LOVE Honest Conditioning Mist. I’ve purchased 3 at this point, having given away 2 as gifts. If you’ve got a little one in your house with enough hair to run a brush through, then this product will serve you well.

The scent is very light and very mild, and it works like a detangler on knots. My daughter feels spoiled every time we use it on her, because she knows that conditioner softens the hair, so getting to use this is like getting to have conditioner twice :-).

This is another great add-on product for your bundle, as if you put it in your bundle, you’ll actually pay more for it than the retail price, and if you tack it on as an extra, you’ll get it at  a 25% discount.

Have you tried the Honest Conditioning Mist, yet? Are you a fan like we are?

Filed Under: My Favorite Finds · Tagged: honest company, honest company free trial, honest company reviews, honest conditioning mist, review, the honest co

DIY Shower Disks to Help Support the Lungs

February 25, 2014 · by Tiffany Merritt · 81 Comments

If you are struggling to make it through cold and flu season unscathed, take a moment to read through this great DIY shower steamer tutorial from my good friend (and blogger extraordinaire) Kayla. She and I share a love for essential oils. I can’t wait to tell you guys what they are doing for me! 

showersteamers_1 (2)

I am so not a fan of cold and flu season. This winter has been one for the record books and it’s certainly brought along it’s fair share of the sniffles. I’m currently on the lookout for products that can help support the lungs and sinuses, so when I saw a few tutorials online on how to make a DIY version of shower steamers I thought that would be a great place to start! After all, a steamy shower is my go-to weapon for supporting the immune system, and especially the lungs.

If you’ve never seen these, they are basically little pods that dissolve in the shower and they may help clear your head (and your nose!) You can totally whip these up quickly at home with ingredients you most likely already have on hand. I played around with the recipe a bit until I found one that worked well for us. The whole project only took 30 minutes, start to finish!

Here is what you will need:
  • A muffin tin + liners (or a silicone muffin pan if you have it, that would be super easy)
  • Baking soda
  • Cornstarch
  • Water
  • Essential Oils: Eucalyptus and Lavender (You can also add in Rosemary or Peppermint if you like)
  • (When working with essential oils, I recommend using a glass bowl)
showersteamers_ingredients
Mix 1 cup of baking soda with 1 tablespoon of cornstarch and about 1/3 cup of water until it forms a thick but slightly pourable paste. You might have to add a little more water, just go slowly until you reach the consistency you want.
Mix with a fork and spoon in to muffin tins. I typically fill them about 1/4 full.
showersteamers_mixing (1)

Bake at 350 degrees for about 15-20 minutes. Let cool and then add about 3-4 drops of each essential oil to the top of each disk. I had peppermint oil on hand and added a drop of it to each because I really love the smell of it.

When dry, remove the shower disks from the tin and store in an airtight container. Like a mason jar. I’m southern. We put everything in mason jars, y’all. We drink sweet tea straight out of them. We just can’t help ourselves. But look how cute!

 

At the first hint of the need for some nasal function support, pop one of the shower disks onto the floor of the shower when you get in. There is nothing like the scent of eucalyptus in a steamy shower when you aren’t feeling well!

I use the lavender essential oil in our diffuser every night to help promote a relaxed feeling so that was one I already had on hand and I plan on making some DIY chest rub with the eucalyptus oil so I should get some good use out of it! Packaged up in a pretty container, these all-natural shower steamer disks would make a great “Get Well Soon” gift to accompany a bowl of chicken soup to a sick friend!


And of course, you can always leave a comment here with any questions you might have and I’ll try to get you an answer or follow up with you directly over email. I’m new to using essential oils myself, but so far, I’ve been quite impressed with what I’m able to do with them!

*I am not a medical professional, I’m just sharing a natural remedy that has worked for our family. As always, if you have any allergies or medical conditions, consult a physician before use.

** Eucalyptus is generally not recommended for children under the age of 10. Therefore, these shower disks are best for older children or adults. 

You might also want to give this homemade vapor rub a try for after the shower.

DIY vapor rub

Need another cheap and easy DIY gift idea? Try these gorgeous peppermint bath salts with candy cane stripes!
PeppermintSaltsTiff1

More essential oils posts:

  • Getting Into Essential Oils as a Skeptic
  • Supporting My Lungs and Sinuses Throughout the Seasons
  • Essential Oils for Weight Loss
  • How to Get Started with Essential Oils
  • How to Get Free Essential Oils Without Starting a Business (It’s EASY!!!)
  • Use Lemon Essential Oil to Safely Remove Crayon Marks
  • How to Get Rid of Hiccups with Peppermint Oil
  • How to Strengthen Brittle Nails with Essential Oils
  • Supporting the Immune System with Thieves
  • How to Neutralize Bathroom Odors in a Flash

Filed Under: DIY Projects · Tagged: aromatherapy shower steamers, diy, diy shower steamer tutorial, diy shower steamers, essential oils, how to make shower steamers, shower steamers

How to Organize and Store Wrapping Paper (Giveaway!)

February 25, 2014 · by Tiffany Merritt · 76 Comments

I don’t know what the gift wrap situation is in your house, but my husband is NOT a fan of having tons and tons of rolls. In fact, he has told me that he would be perfectly happy using up an entire roll before ever buying another one.

I’m not a fan of the art of gift wrapping (I wrap presents like a 5 year old…no, seriously). But I DO appreciate having a little variety in my wrapping paper choices (or, let’s be real, my gift bag choices). So we compromise, and I only purchase 2 or 3 rolls every year to replace the ones that get used up. I show EPIC restraint during the after Christmas sales, let me tell you!

gift wrap storage that actually works

Even so, over the years all of our gift wrap supplies have grown a bit, and take up 2 boxes that slide under the bed instead of just 1. Basically, it’s a mess, and for the size house we have (under 1400 square feet) wrapping paper is taking up too much precious real estate.

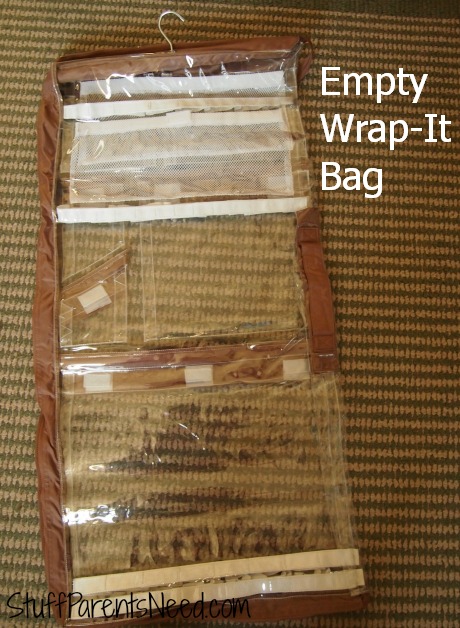
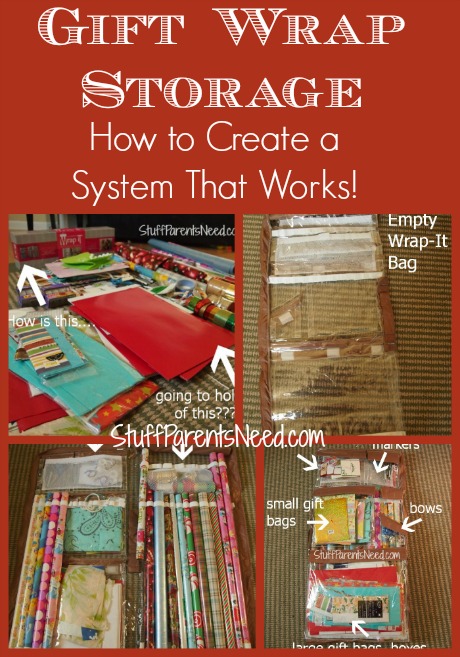
wrap it gift wrap organizer The folks at Wrap iT recently asked me to try out their product designed to organize gift wrap. When it came in the mail, I set it out next to all of our supplies and thought, “Um, I don’t think so!”

wrap it gift wrap storage

So I got the storage bag, which is designed to go under your bed, or even hang up in the closet if you like. Even though I noted all the pockets and storage areas, I still wasn’t convinced that it was going to hold everything.

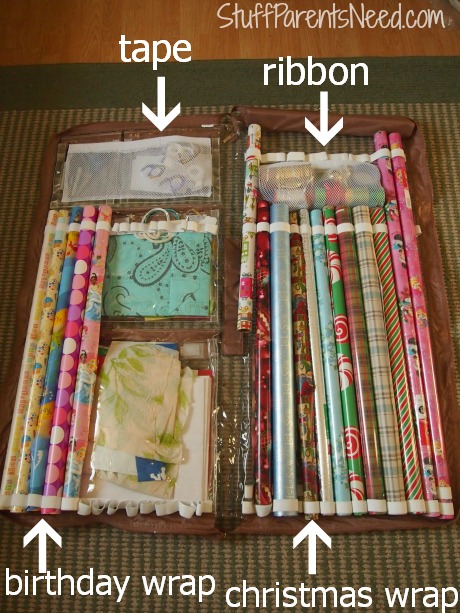
So then I started finding homes for everything, and little by little, my big pile of wrapping paper supplies started to dwindle.

wrap it organize gift wrap

I kept the birthday wrapping paper on one side, and the Christmas wrap on the other. The inside of the Wrap iT also had space for tape and ribbons.

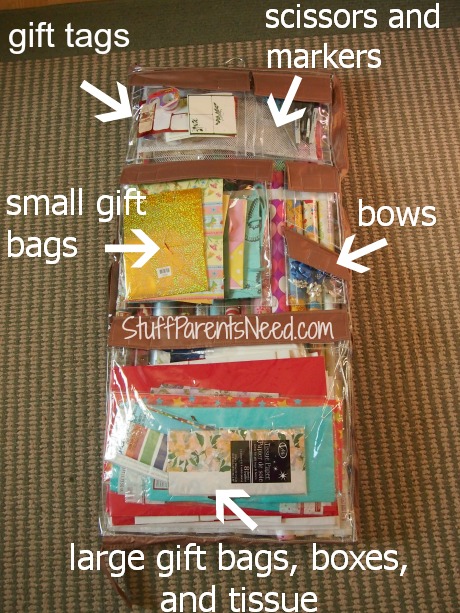
wrap it wrapping paper storage The outside of the Wrap iT had a lot of pockets, and that’s where I put my boxes, tissue paper, gift bags, gift tags, scissors, markers and bows.

Yes, indeed, the Wrap iT held that entire pile of stuff. And now the space we have devoted to storing gift wrap supplies is cut in half, and instead of having to drag out two boxes any time we want to wrap something, we only have to reach for one thing.

I’ve seen it with my own two eyes, friends, the Wrap iT works! If you want to see for yourself how Wrap iT works (in 100 seconds!) check out this video.

Save 25%

I’ve got a coupon code just for my readers so that you can keep the cost down if you’d like to have Wrap iT in your home! Use code SPNRocks25 at checkout and the price goes down from $59.97 to $44.97. This would be an AWESOME gift for a college grad, newlywed, or anyone who is just looking to get more organized. We love our Wrap iT and we’ll never go back to boxes under the bed!

Win it!: One lucky Stuff Parents Need reader is also going to WIN a Deluxe Wrap iT! If you purchase the product using the coupon code and then go on to win the giveaway, your purchase will be refunded! 🙂
a Rafflecopter giveaway

Be sure to enter my other current giveaways, found on the sidebar of my page.


Filed Under: Giveaways, My Favorite Finds · Tagged: deluxe wrap it, gift wrap, gift wrap organizer, gift wrap storage, giveaway, review, wrap it, wrap it review, wrapping paper storage

  • « Previous Page
  • 1
  • …
  • 121
  • 122
  • 123
  • 124
  • 125
  • …
  • 326
  • Next Page »

Connect

  • Email
  • Facebook
  • Instagram
  • Pinterest
  • Twitter

Welcome!


Grab your beverage of choice (mine is iced coffee) and let's hang out for a spell! I'm Tiffany, and I've rambunctious little girls and a fierce desire to share any tip and trick I can find to make lives with little ones a bit less hectic and a lot more fun. [Read more...]

Popular Posts

Keep Slowing Down. You’ve Got a Race to Lose

Keep Slowing Down. You’ve Got a Race to Lose

Free Summer School for Moms (You’ll Love It!)

Free Summer School for Moms (You’ll Love It!)

The Best Cheap Mattress is Also The Best Quality Mattress: A Must-Read

The Best Cheap Mattress is Also The Best Quality Mattress: A Must-Read

25+ Moana-Inspired Easter Basket Ideas

25+ Moana-Inspired Easter Basket Ideas

The Book Every Child Should Own (And How to Get a Free Copy )

The Book Every Child Should Own (And How to Get a Free Copy )

Recent Posts

  • Educational Family Activities That Don’t Feel Like School
  • How to Set Up Your Kid’s First Tablet (Without Losing Your Mind)
  • Choosing an Engagement Ring in a Changing Landscape
  • Personalized Clothing in Family Portraits: Showcasing Unique Style
  • The Psychology of Dual-Monitor Productivity: Why It Feels Easier to Work

Search

Sponsors

Copyright © 2026 | Innovative by The Pixelista | Built on the Genesis Framework


Loading Comments...