• Home
  • About Me
  • Policies
  • Work with Me
  • Guest Posting
Stuff Parents Need

Stuff Parents Need

Easing the chaos in the nest, one find at a time.

  • Style
  • Parenting
  • Giveaways
  • The Kitchen
  • DIY Projects
  • Fun Things To Do
  • My Favorite Finds

Real Talk: How to Determine What Filler is Best for your Problem Area

February 13, 2018 · by Tiffany Merritt · Leave a Comment

Shout out to all my fellow mamas out there who catch glimpses of themselves in the mirror and have to do a double take, and not in a good way. It’s happening to me with increasing frequency! Hopefully today’s guest post will give you some ideas if you are looking at the woman in the mirror and asking her to make a change!  

At a certain point in life, it is normal to start feeling less satisfied with your overall facial appearance. Gravity and the natural process of aging have a way of making changes that can creep up on you over time.

best fillers

If you have ever looked in the mirror and wished you could turn back the clock, you are definitely not alone! According to the American Academy of Facial Plastic and Reconstructive Surgery (AAFPRS), more people than ever before are seeking to improve their appearance through scheduling facial plastic surgery procedures.

One confusing aspect for most patients is the sheer number of fillers that are available today to deal with problem areas of the face and neck. How do you know what filler is best for your problem area? Here, your choice of plastic surgeon can greatly influence finding the best match between your problem area and the filler selected to address it.

What Types of Fillers Are Popular?

Fillers, which are sometimes also called “dermal fillers,” are treatments that are placed under the skin’s surface via injection with tiny needles. The goal of these fillers is to smooth the appearance of wrinkles and give the skin a youthful, refreshed appearance.

Dr. Bustillo strongly believes in using only Food and Drug Administration (FDA) approved non-permanent dermal fillers, because these are the only fillers that have been proven to be completely safe to use on facial plastic surgery patients.

NOTE: If a surgeon wants to use biopolymer or silicone fillers to treat your problem areas, you should not permit that surgeon to operate on you! These fillers are now known to create serious and sometimes permanent damage!

Dr. Bustillo uses two main fillers: hyaluronic acid fillers and calcium hydroxyapatite fillers. Examples of hyaluronic acid fillers include Juvederm and Restylane. Examples of calcium hydroxyapatite fillers include Radiesse.

Sometimes botulism toxin, Botox or Dysport, is confused with facial fillers. This type of facial treatment is also done via injection with tiny needles, but the result is not one of filling in an area of the face but rather of relaxing the muscles in that area of the face.

How Do Hyaluronic Acid Fillers Work?

Juvederm and Restylane are two of the most popular hyaluronic acid fillers used by facial plastic surgeons today. These two fillers are popular and well known and can last up to six months.

Hyaluronic acid fillers are composed of naturally occurring sugars that the body recognizes so there is no danger of allergic reaction or rejection.

Dr. Bustillo uses hyaluronic acid fillers in the area between the eyes and the cheeks, the area between the nose and the lips and the area just below the lips and to fill in thin lips.

How Do Calcium Hydroxyapatite Fillers Work?

Calcium hydroxyapatite fillers work to stimulate the skin’s own natural production of collagen, the protein that is responsible for a plump, fresh, youthful skin glow. These types of fillers can last up to 12 months.

Dr. Bustillo uses these dermal fillers for the area between the nose and the lips, the area just below the lips and to augment the cheek areas.

What Types of Wrinkles Exist?

In many cases, patients do not realize there is more than one type of skin wrinkle. But there are actually two different kinds of facial skin wrinkles! One kind is called static wrinkles and the other kind is called dynamic wrinkles.

Static wrinkles most frequently appear in the lower area of the face (lower cheeks to chin and below). These wrinkles tend to appear when the skin starts to naturally lose elasticity along with the aging process and the impact of gravity.

Both hyaluronic acid fillers and calcium hydroxyapatite fillers can be used to treat areas where static wrinkles exist. Often, the choice of which filler to use focuses on the severity of the static wrinkles and/or how long the filler treatment will last.

Dynamic wrinkles are wrinkles that appear due to the natural activity of the muscles of the face. If you have ever heard of a model or actor who didn’t want to smile to try to stop wrinkles from appearing, the wrinkles in question were dynamic wrinkles.

Dynamic wrinkles tend to occur in the upper area of the face, including the forehead, the area in between the eyes and the areas around the eyes. For these types of wrinkles, Dr. Bustillo typically recommends the use of Botox or Dysport.

What Filler Is Best For Your Problem Area?

The answer to this question will depend on the scope and severity of your problem area, the type of wrinkles you are experiencing (static or dynamic or both) and your overall facial appearance goals.

Here, it is vital to select a facial plastic surgeon you can talk with openly and trust implicitly, since you will be relying on your surgeon’s extensive medical and surgical expertise to recommend just the right filler to help you look and feel your best!

The first step to selecting the right filler is to schedule your initial consultation with Dr. Bustillo. During your consultation, you can share your concerns and goals and discuss with Dr. Bustillo how best to achieve your goals.

Dr. Bustillo will examine the area to be treated, take photos and talk with you about treatment options, answering your questions and ensuring you feel completely confident and comfortable with the recommendations for treatment.

About Dr. Andres Bustillo, M.D., FACS

Dr. Andres Bustillo has more than a decade of experience assisting patients to achieve their facial plastic surgery appearance goals. A board certified facial plastic surgeon, Dr. Bustillo has special expertise in performing rhinoplasty, revision rhinoplasty, blepharoplasty, deep plane facelift and minimal incision neck lift procedures.

Filed Under: Style ·

5 Last-Minute DIY Gifts That Anyone Can Make

February 12, 2018 · by Tiffany Merritt · Leave a Comment

Consider this your PSA that Valentine’s Day is in TWO DAYS!!! Ack!!!


Image source: DepositPhotos.com

Procrastination can be a terrible trait to have especially when it comes to gift giving. The time just seems to race by and now you are caught with little money, no ideas and a looming deadline. Here are some great DIY gifts that take little skill and time. What’s more, handmade gifts always win first-place with the recipient.

1. Candy Coins

A great gift for kids, candy coins require little skill to make. Grab a roll of quarters and wrap in a festive paper. Roll again in cellophane and tie each end with bright ribbons. Each roll holds $10 worth of quarters and these are great for vending machines or saving for a rainy day. Take your idea one step further and place a couple of wrapped candy coins and place in a jar filled with your recipient’s favorite miniature candies.

  1. Mason Jar Gift

These are one of the easiest and most impressive DIY crafts you can try, even as a beginner. Save those mason jars for last-minute DIY gifts that are unique and treasured, as they’re perfect for all sort of creative presents. Glass is a natural long-lasting substance that will keep food and soap fresh. And because it is clear, items stored inside are always identified right away.

One unique idea that can be easily made from a mason jar is a sewing kit. Keep little spools of thread, sewing scissors and needles contained and easily noticeable. Cover the lid with cotton and a piece of colorful material and you have a convenient pin cushion.

  1. Lip Balm Locket

Homemade lockets are cheap and easy last-minute DIY gifts for any woman. No more rummaging through a purse to moisturize those chapped and dry lips. Lockets are a great fashion statement and will always provide lip balm when needed. You can find beautiful lockets at any thrift store or you may have one in your home. Just melt down a tube of stick lip balm and pour into a beautiful locket. This gift will be a reminder of a personal friendship and a convenient lip balm holder as well.

4. Bird Seed Wreath

If a nature inspired gift is needed, make a handsome bird seed wreath. The backyard collection of winged friends will bring a smile to your gift receiver’s face. You will need to begin this project a day in advance to allow for dry time, but the process is so easy. With a Bundt cake pan or jello mold, an assortment of bird seed goodies and a few items from the kitchen, this delightful cake can be whipped up in no time. Toss in fresh berries and nuts to make this treat colorful and attractive. Top off with ribbon or rope for easy hanging from a tree or post.

  1. Gift Baskets for Newlyweds

Starting a new home is not as simple as it may seem. Cooking, cleaning and organizing can become a startling discovery for a new couple. Think of when you were first starting out and the items that were needed. Take one topic and turn it into a basket full of those forgotten items. For example, take an oven mitt and fill it with wooden spoons, spatulas, toothpicks, straws, peelers and hand-held mixers.

These items will be much appreciated during meal preparation and entertaining. Another great idea is filling a colander with fixings for pasta. Dried pasta, sauce, olive oil, bread sticks, and, of course, a great bottle of wine will delight the newlyweds.

You don’t have to spend a lot of time and money to make your gift special and memorable. In fact, the creativity of your idea will leave a wonderful lasting impression on the one receiving the gift. All of these DIY gift ideas can be put together in a few hours and will make you happy that you didn’t rush out and buy a less than meaningful gift.

Anyone else making some DIY Valentine’s Day gifts? Leave me a comment with what you are planning!

Filed Under: DIY Projects ·

Cheap Airfare to Hawaii: How We Booked Amazing Flights without Using Points

February 6, 2018 · by Tiffany Merritt · Leave a Comment

My family of 4 is getting all geared up for a a 14 day stint in Hawaii (specifically, the island of O’ahu), in just a few weeks. While Hawaii has been at the top of my travel bucket list for quite some time, now, we committed to making this trip without having any sort of advanced plan or budget. This is a dangerous way to go about your vacation planning, but it’s also a way to save HUGE amounts of money on one of the biggest expenses: airfare. Our trip is happening because we scored cheap airfare to Hawaii.

So here’s what happened: my husband signed up to be a member of Scott’s Cheap Flights, which is a company that will send you deals on travel opportunities (mostly international, but some domestic, as well) via email. You can set up the parameters you like (such as desired departure and arrival locations) and then just wait and watch for the deals. The more flexible you are about where you go and where you leave from, the more deals you can see (we probably see 5 or 6 different destinations each day, and each destination usually has several potential points of departure for low prices). I also like that the site will compare the price with the typical price for that flight, and give you an educated guess about how long they think a fare of that sort will last (because sometimes it’s so low that it will likely last less than an hour, and sometimes it will probably last several days). Membership for the year is $39, which is quite reasonable for a service that will help you save hundreds of dollars, even if you only book one flight per year.

So Tim signed up in the fall and had been watching for deals to very cool sounding destinations. Two days after Christmas, a mega deal came up for travel to Hawaii from the east coast, including Atlanta, which is our nearest international airport. Tickets are typically around $900 each from Atlanta and had just dropped down to $374, for a savings of $526/ticket ($2,104 for 4). The commentary from Scott’s was that this was a very rare deal that would most likely not be seen again for a really long time, so if Hawaii was where you wanted to go most, better pull the trigger now.

And that’s exactly what we did. We decided that we really wanted to go, that this price would allow us to actually go, and that we could finagle a way to be on the island for 14 days so we could REALLY enjoy it. We decided that we’d work out all the logistical details (like how we’d pay for lodging, food, a rental car and activities) later. And folks, that really is a risky move to make (I’ll do a separate post about how expensive Hawaii is, as it turns out, and steps we are taking to minimize our financial pain). But there was simply no time to plan out a vacation and then buy tickets at this price point, so we took a leap of faith. We also knew that we had additional funds available to work with on the ground, and that’s important to know. If the airfare completely eats up the money you have available for travel, you may need to save up some more funds before you spontaneously book a trip, because it doesn’t matter if the plane tickets are a great deal if you can’t afford to eat or sleep once you arrive. Just something to keep in mind!

This strategy didn’t make use of credit card points or frequent flyer miles, which is a common method people like to use for keeping flight expenses low. Since we both don’t travel very often for work, we simply don’t build up enough miles to be helpful in any given year, and I find that my credit card reward points can be a little spotty. They are more ideal for using when we have a set destination at a set time that we want/need to go to, vs. when we are just trying to find the very best deal to get 4 people somewhere fun.

So this is how we booked cheap airfare to Hawaii. We let someone else do the searching for us each day, and we watched for the price drop to occur. It happened a bit sooner than we were expecting, but it did happen, and we jumped on it!

Stay tuned for a breakdown of our proposed itinerary, including all the amazing touristy things we WON’T be doing. 🙂

Filed Under: Fun Things To Do ·

Even the Best Workbooks Can’t Compete: Why Smartick is My Top Pick for Learning Math

January 24, 2018 · by Tiffany Merritt · Leave a Comment

Thanks to Smartick for providing complimentary online subscriptions. As always, all thoughts and opinions are strictly my own.

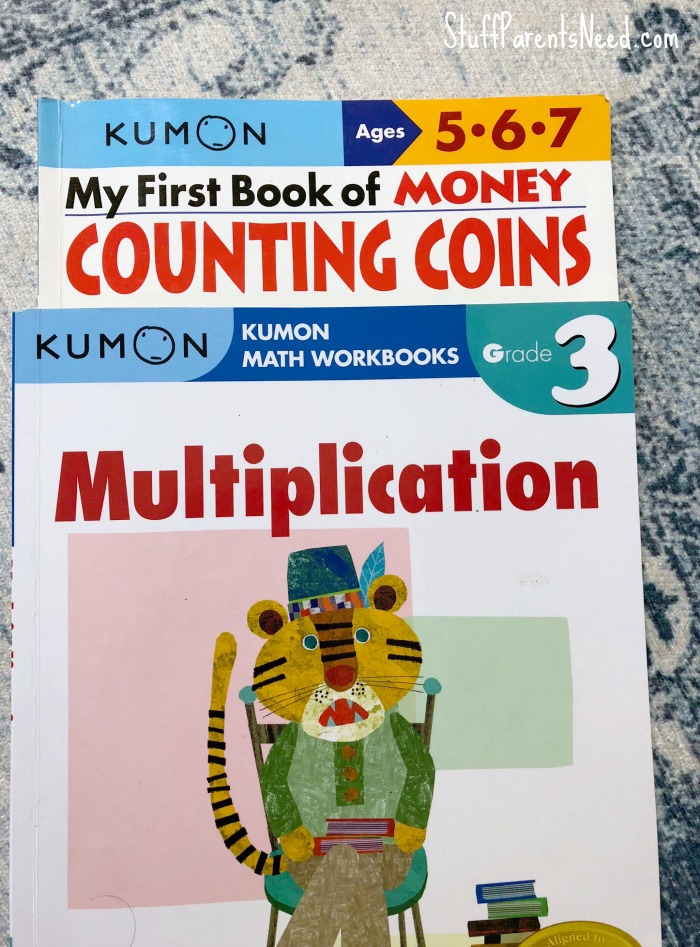
As a homeschooling parent, I consider myself to be a bit of a workbook junkie. I don’t like to use workbooks as the sole basis for learning, but I do find them useful for daily drills and practice sessions, just to help reinforce what we are learning. I have tried many, MANY different brands of workbooks, and I do have a few favorites. For math, I personally find the Kumon workbooks to be top notch and have used them with my children since they were each around 2 years old.

I find the illustrations to draw the children into the work, and I find the problems to be appropriately challenging and for the lessons to build on each other in a way that makes sense. These are the Kumon workbooks that my kids are using right now, just to show you that I really do use them and believe them to be worthwhile!

But at the end of the day, even my favorite workbooks just can’t seem to provide my kids with the same results that we are getting from the online resource Smartick.

With a workbook, unless you are hovering over your child while she works (which my kids do NOT like!) you won’t know until she’s all finished if there are some mistakes. It’s a book, so there’s no feedback loop unless you are providing it.

With Smartick, you know immediately if you got an answer wrong, and you are shown the correct answer. The child can choose if they want to sit with that information for a minute and figure out why they got it wrong, or they can decide to give it another shot after their daily session is finished, at which point they are offered the chance to make corrections. This is often when I will sit with my girls and determine if they just made a sloppy error before (such as accidentally putting in the numbers wrong) or if they don’t seem to understand how to get to the correct answer, and then we break it down on a sheet of paper and try to figure it out. I personally just notice that going back over incorrect work on worksheets doesn’t seem to produce as many light bulb moments because they have mentally moved on from the problem when they learn that there is a mistake. With Smartick, the feedback loop is much tighter, and I think we get better results that way.

Additionally, my girls both seem to get a great deal of enjoyment out of the “ticks” they earn while doing their work, and trading those ticks in for pets and accessories for their avatars. All I can offer them for their workbook efforts is a sticker, and they are WAY more into their Smartick rewards, I promise!

So while I still find the Kumon books useful as a reinforcement, and for times when I have a child in a waiting pattern for a period of time (such as during a sibling’s ballet lesson), Smartick is definitely the superior resource for helping my children truly master what they are learning. Since the program is sensitive to what each child is getting right and wrong, it also does a much better job of bringing back up different types of problems to check on mastery and to help ensure the child really gets it. With a workbook, once you’ve done the problem set, that’s it, and you move on, whether or not your child actually understands the material.

Smartick sessions last 15 minutes each day, by design. It just asks the student to concentrate and give a good effort for a short, doable period of time, and my girls love that. They know their Smartick sessions won’t take forever. 🙂 You can check out Smartick for free for 7 days, or you can enjoy a 25% discount on a membership by using my referral link (if you use it, I think I’m also offered a discount on my subscription as a thank you). It’s absolutely worth checking out! We are getting our best results ever through the program.

Filed Under: Parenting ·

Why Kennedy Space Center is a Must-See for School-Aged Children

January 20, 2018 · by Tiffany Merritt · Leave a Comment

Thanks to Kennedy Space Center for providing complimentary tickets. As always, all thoughts and opinions are my own.

Friends, if you have ever entertained the idea of paying The Kennedy Space Center Visitor Complex in Titusville, Florida a visit, I want to make it my special mission right now to convince you that you simply must make it happen. And if the thought has never even crossed your mind, then I want to cause it to go on your travel bucket list, and to get a pretty high ranking, at that.

The Kennedy Space Center Visitor Complex BLEW MY MIND and y’all, I didn’t even see it coming. I was excited to go. I had heard that it was really well designed so that visitors of all ages could get something out of it (an initial worry I had was that it would be too “boring” for kids…I could not have been more wrong about that!). And I think space is kind of neat, so I was up for it and thought it was worth the hour long drive from Orlando to check out.

kennedy space center with kids 2

But I didn’t realize just how big of an impact it would have on my kids, and even on me as a parent and a homeschool teacher. I can’t wait to show you some of the amazing things we learned during our visit!

I will echo sentiments you will read on other KSC review posts, which is that you need to give this an entire day. You will be SO sad if you only budget half a day. We were there at opening (they play “The Star Spangled Banner” which is a really moving way to get things started), and we closed them out that evening. We didn’t even come close to seeing it all and we were there on a low crowd day.

The very first thing we did was book it over to the Atlantis to watch a film that really helps you better understand what a mammoth undertaking it was to try to develop a reusable space shuttle, and that showcased failure after failure, year after year. It took 12 years and a countless number of problems and obstacles that had to be faced and overcome by hundreds of brilliant minds working together. It would have been so much easier to have given up, and this was where the message became so very powerful for the kids: these individuals, working together on a seemingly impossible goal, showed up day after day and put the hard work in, refusing to give up in the face of failures and mistakes. And then you get to the see the finished product right before your eyes. My husband, mother-in-law, and I all cried at the sight of Atlantis, and my children were just so giddy to see the fruits of all that labor!

This area also showcases the Hubble telescope and gives you more information on just how critical all of these missions to space have been in providing us with our current way of life that depends on satellite communications so heavily. We didn’t look at everything in this area first because we wanted to catch the first shuttle of the day over to the Apollo and Saturn V Center. It’s easy to come back to, and we didn’t mind doing exactly that!


The bus tour does take about 45 minutes, and kids are provided with a nice coloring book and crayons for the journey, which I thought was a nice (and smart!) touch. Do make sure to use the restroom before you head out because there are no pit stops. This part of our visit was the highlight for my husband. I took the shot seen above because I knew he was having a real moment getting to see the launch areas, and the outside of the building where all the rocket construction actually happens. He really was like a kid at Christmas (also note the photo below, of him on Christmas morning, getting a gift from the Kennedy Space Center gift shop! Same level of happiness!).

occupy mars

Once you are off the shuttle you get to check out the Saturn V and it is so huge, that you really just have to see it to believe it!

This is where we had a delicious lunch and got to see so many more amazing things. It’s also where a retired NASA engineer was hanging out so he could answer questions. Everyone in my family took advantage of this opportunity to learn more about what it’s like to be part of NASA and a team that achieves the impossible. I really loved that Mr. Whitson was available and gave of his time this way. Getting to talk to him made it all that much more real for my kids!

kennedy space center with kids 7

We also watched a great presentation on the moon landing while in this section of the visitor’s center. Don’t miss it, because it was so well done!

kennedy space center with kids 8

Really, I have to give a huge hat tip to all the curators of this facility who tell the story of space exploration in such a compelling way, exhibit after exhibit. After a day at KSC, I understood just how incredibly awesome it is that we put human beings on the moon, in a way that has never clicked with me before. It’s a REALLY BIG DEAL, y’all. And now I’m so pumped up about the work ahead to get to Mars, whereas before I just thought it was “neat.” No, friends. It’s not neat. It’s SOOOOOO AWESOME!!!! And I feel so much more interested in keeping up with the cool things SpaceX is doing, and teaching my kids more about the history of space exploration, as well as the needs up ahead and how they can be part of it, if they develop a passion for it.

We also planned our visit for a day when a female astronaut would be present so that our girls could meet her and maybe even get to ask her a question. Astronaut Anna Fisher gave an incredible talk and though she only had time for one question, we were all SO EXCITED when she picked a little girl, my little girl, to get to ask it (she asked about whether or not she felt scared to go into space and Anna talked about all the preparation she did to get to go, and how that helped her feel more prepared and less scared).

The Kennedy Space Center Visitor’s Complex is a very exciting place for children as well as adults, and it really leaves an impact that can last for a lifetime. We have gone back to the astronauts and the engineers and the incredible amount of perseverance they all have had to have in order to get into space, and as we face hard problems and challenges in our studies, we remember that we don’t need to fear failure, because that’s still a result that we can work with as we learn and grow. Our main job is to show up and be willing to put in the hard work, just like they did. It has made a big difference in the amount of resilience I can see in my kids and in how I tackle the challenges I face as a parent and a homeschool teacher.

kennedy space center with kids 1

I cannot wait to go back to this place again, perhaps in a few years’ time, to revisit these incredible exhibits and to hear the stories of triumph. If there is any way for you to get to this part of the country for a visit, make it happen. It was simply incredible!

Filed Under: Fun Things To Do ·

Spotted: Brilliant Comfort Food for Tired Mamas and Growing Kids

January 19, 2018 · by Tiffany Merritt · Leave a Comment

This is a sponsored post written by me on behalf of Cole’s MIDDLES™. All opinions are 100% mine.

Last week was the first time I heard of a frozen food product called Cole’s MIDDES™. Basically these are yummy bread bites filled with cheesy awesomeness inside. They come in 6 varieties that all sound so dang good: Pretzel Beer Cheese, Bread 5 Cheese, Bread Mac & Cheese, Pain Bagel Cream Cheese, Everything Bagel Cream Cheese, and French Toast Cream.

In a recent conversation with my mom I was bemoaning how hard it can be to keep the kids from eating 25 times a day when they are going through growth spurts. She was one of 6 kids, growing up, and she told me that her mom would always have some sort of bread product on hand for just those times (biscuits, extra bread, etc.). I instantly recalled MIDDLES and knew they would be the PERFECT snack for me to have on hand any time one of my girls becomes a bottomless pit.

So yesterday we headed off to Walmart, with a $1 Off Coupon in hand, to scoop up some new snacks. I was initially bummed to see that my nearest store only carried one flavor (beer cheese), as that’s not really a flavor that I think my girls are going to love. But then I saw the opportunity for what it was: a chance for this tired mama to get to relax and enjoy something really yummy, too. I may not be having anymore growth spurts, but that doesn’t mean that I don’t need something really filling and yum in my tum every now and again. 🙂

The directions on the box say to microwave or use the oven, and I love that the microwave option is available (for those hangry moments in life) but I’m guessing that if you have the patience that the oven produces a better bake, so that’s what I went with today.

The result? Cheesy bread perfection, y’all! What a treat for this post-holiday, post-extensive travel, post-wisdom teeth surgery mama who is getting through her days on nothing but fumes right now (rest is coming…see you in 6 weeks, Hawaii!). But for now, this bread is feeding my weary soul!

My store locator shows 3 other Walmart locations in my city where this product is carried, so I’ll just be on the lookout for other flavor varieties for the girls when I’m in those stores. Now that I have tried them (and loved them!), I’ll definitely keep my eyes open for Cole’s MIDDLES again. You can Check them out here if you’d like more info on where to find a box (or 6) for your freezer!

Visit Sponsors Site

Filed Under: The Kitchen ·

Get This Travel Accessory Right: Kids’ Headphones

January 18, 2018 · by Tiffany Merritt · Leave a Comment

Thanks to BuddyPhones for sending along a set of headphones for review. As always, all thoughts and opinions are my own.

When my family goes on a road trip or a plane trip (and we’ve been doing our fair share of both over the past year), we never go without a tablet for each kid and a set of headphones to go with each. We don’t use our own headphones for the kids for a few key reasons, such as sizing difficulties and the lack of safe volume control.

We’ve also found, through our own trial and error, that you often get exactly what you pay for when it comes to the quality (so really, the same as with adult headphones). We learned this lesson the hard way when a under $30 pair of headphones for one child stopped working in the middle of one of our trips. For our kids, getting to watch their favorite downloaded Netflix content or playing games they really love does wonders to help pass the time. More power to you if your kids can happily stare out the window for hours, but not mine. That’s the type of loss that has to be replaced pretty much on the spot.


So what we use now are the BuddyPhones WAVE headphones and they have performed beautifully so far! We are not currently using the wireless feature on our car trips but we will make use of this feature when we head to Hawaii next month and will appreciate ditching the cords during our layovers. It has 24 hours of battery life, so it’s go to go for quite a while!

Another great feature of the BuddyPhones WAVE is that they are waterproof! And while we don’t plan to go swimming with our headphones on or anything like that, it’s great to know that if the kids knock over their water bottles and their BuddyPhones are in the line of fire, it’s going to be ok.

Both girls have also reported that the headphones feel comfortable, and I have noticed the great durability of the headphones. They can be pulled and twisted and not only will they not break, but they also won’t even warp. The design really does have kids in mind (as well as parents who don’t want to have the replace the headphones in a few weeks or months).

And of course, BuddyPhones WAVE does have sound adjustments that make sense. You can choose between Toddler Mode (75Db), Kids Mode (85Db), Travel Mode (94Db) or the Study Mode (94Db). I appreciate the uptick in sound for plane rides, as we have had child-safe headphones before that just don’t get the job done when there’s an engine roaring outside the window.

Based on our experience, we would highly recommend the BuddyPhones WAVE for your next family adventure!

Filed Under: My Favorite Finds ·

How to Have a Lowkey Magical Day at Disney’s Magic Kingdom

January 2, 2018 · by Tiffany Merritt · Leave a Comment

Thanks to Walt Disney World for providing 2 complimentary media passes for the day. All other expenses were my own, and of course, all opinions are mine!

If you are thinking about taking your family to Walt Disney World, then I have a lot to say about just how wonderful it is to go all out, and to stay on property and go to every single park. We had that experience a few years back and it was some of the best money I’ve ever spent on a vacation. No regrets, whatsoever!

But that type of trip isn’t always in the cards. This year we really wanted to get to experience more of what central Florida has to offer, but I just couldn’t stand the thought of not getting to visit the most magical place on earth, even if just for a day. So we decided to dedicate one day to WDW and to head to my favorite park, Magic Kingdom. If this had been the very first time I had taken my kids to the park, I honestly would have been very stressed and overwhelmed to try to squeeze everything into just one day, but since it wasn’t their first trip here, I felt good about what we could likely see and do, with a bit of prep work on the front end, of course!

We were fairly relaxed on this visit, and were able to discover some lowkey (secret) awesome things to see and do here. Some of these suggestions can be found in the bazillion other blog posts out there about Magic Kingdom, but some of them we discovered on our own (which is not to say someone else hasn’t already written about it, but just that I didn’t read about it before we went). I hope these tips help anyone else who might be visiting Magic Kingdom during a low crowd time of year like we did (we were there 5 days after Thanksgiving).

secret awesome places at disney world

  1. The First Ferry

Arriving early is a tip that has been talked about over and over and over again online, but I just want to show you a few key examples of why getting to the park extra early is so great. We went on a day when the park opened at 8 am for everyone (so those aren’t magic hours) and that early opening was because the holiday party was happening that night which meant folks who hadn’t bought separate tickets to that event had to be out at 6pm. We were driving up to the WDW gates at 6:45 am and had the car parked by 7 am. We got an awesome parking spot, which we were so grateful for at the end of the day. We also got on the first ferry of the day and it looked like this:

I’d estimate that boat had maybe 30 people on it, total. It was AWESOME!!! Beautiful, unobstructed views were ours to soak in on the short ride, and there was no mad rush/stampede as we unloaded. There weren’t yet long lines to get into the initial gate and we had great spots by the rope drop. We even used the restrooms found by the front entrance of the park once we arrived (do that before you go through the admissions gate!) as that saved us some time once we were let into the park.

2. The Opening Ceremony Rocks!

If you have a good spot at the initial rope drop, you’ll also get to have a good spot at the place inside the Magic Kingdom where you have to wait again before the park is fully opened. We were not gunning for the Seven Dwarfs Mine Train so we went to the left side of the castle, where there was a smaller crowd. We got to see so many Disney Princesses and of course, Mickey and Minnie before the park even officially opened. It was such an easy way to get to have a great Disney experience at the very beginning of the day. Don’t miss this, if at all possible!

3. The Fantasyland Strategy

Plowing through Fantasyland during the first hour the park is open is a very popular strategy, and yet I’m surprised by how many people don’t do it, or who opt to get in line for the mine train first and in so doing, miss out on a very empty part of the park (for the first hour, that is!).

Here’s our strategy. We did this exact same thing the last time we were here and it worked out great both times. Make an absolute BEELINE for Peter Pan. If you are near the front of the rope drop you’ll get to Peter Pan quickly enough to walk onto the ride (by the time you get off there will be a 20 minute wait, so it’s first thing or fuggedaboutit). Then march right across the street to It’s a Small World. NOBODY WILL BE ON THE RIDE YET!

Getting to ride this ride, pretty much all by yourself, just adds a whole other layer of magic to it. It’s SO cool, friends!

Once you are off this ride, hop right onto the carousel for a quick spin (both of the wicked stepsisters were riding it at the same time as us! So fun!), and then head over to Winnie the Pooh, where we were also able to walk right on, and then zip over to Ariel’s ride (yet another one we walked right onto!). We did FIVE rides at Magic Kingdom in the first 45 minutes that the park was open. It was some kind of awesome, friends!

4. Hang Out with Belle

If you have children in the age range of 3-7, you just really can’t miss this opportunity. Enchanted Tales with Belle is such a sweet experience because you get to play with a princess in a small group setting for about 10 minutes. You also get to see lumiere and the talking wardrobe and the special effects are so on point. This is a truly magical experience and it will make you feel like you are right inside a Disney movie.

5.  The West Wing of Be Our Guest

I don’t mind telling you that I busted my butt to get my family reservations at Be Our Guest restaurant. It was something I wasn’t able to accomplish during our last visit 3 years ago, and so I was determined to do so this time around. I managed to pick up lunch reservations by checking daily (and borderline obsessively), including at 4 am two days before our trip (that’s when I snagged them). It was a delightful experience that I’m very glad we got to have, but I will say this: if you are only doing one day at Magic Kingdom and it is your first trip with kids, unless someone in your party is obsessed with Beauty and the Beast, don’t kill yourself for this reservation. Why would I tell you that after just admitting that I was obsessed with getting in? Well, it turns out that eating here is going to eat up more of your day than you might like. In our case, we had a noon reservation, and showed up right on time, only to realize that once you get in the castle, you still have to wait in another line. It took us 45 minutes to place our order, which meant that we rushed a bit through our meal because I didn’t realize that eating here would take so long. It is considered quick serve, after all.

Now with all of that said, should you decide to go for Be Our Guest and get one of those reservations, there are 3 dining rooms and one of them is the lowkey awesome one: The West Wing. It’s the smallest dining room, the darkest, and the most awesome by a long shot. If you can take a moment to relax while you are in there (and to block out the other diners) you will feel as though you are, in fact, dining in the West Wing of Beast’s castle, and it’s so, so cool!

6. Adventureland Chill Zones

Two spots in Adventureland are lowkey perfect for taking deep breaths and just basking in the awesomeness that is WDW. The first spot is the Jungle Cruise. You will be pummeled the whole time with super cheesy jokes from the captain of your cruise boat, but if you know it’s coming you can just lean into it and laugh along, because they are corny, but still funny. And the scenery is SO old school and reminds me of WDW as a child more than anything else in the whole park. It’s also relatively peaceful and quiet. Just a great experience! We used a fastpass to skip the lines and that was a good call.

The second spot is up in the Swiss Family Robinson Treehouse. On a low crowd day there won’t be any line and you can just walk right up and start climbing the stairs. You will be rewarded with a special view of the park and since there won’t be crowds around you, just kick back here and take it all in (pro tip: bring a Dole Whip with you…you can find it at a shop right next to the Tikki Room).

7. The Circus Tent Area

On the very edge of Fantasyland, serving as a sort of a buffer between that area of the park and Tomorrowland, is a Big Top area where you will find Dumbo’s Flying Circus, the Barnstormer (a great “first rollercoaster” and also my oldest child’s favorite ride in the whole park), and this gem:

It’s a splash zone and my youngest probably spent an hour here, splashing and running and laughing and having a blast. While big sister rode Barnstormer again and again and again (it’s a great ride for fastpasses later in the day!) she soaked in big fun while getting soaked. It was very quiet and chill, and that makes it another lowkey awesome spot on a low crowd day.

Right next to this area is a character meet and greet (Minnie, Daisy, Donald and Goofy) and I think, honestly, that it’s a spot many people just completely miss, because it is a bit tucked out of the way. We only had to wait 5 minutes to meet Goofy and Donald, and there was absolutely NO problem with my child being soaking wet. I’m guessing they are used to it! 🙂 In a place with very few hidden gems left, I’d say this is still one of them.

When we were down to our last hour in the park before closing, I asked my 8-year-old what else she wanted to do and she said, “Mom, I’ve done so many awesome things! I’m so happy! If it’s time to go home now then that’s ok by me.” That’s when I knew that we’d done our Disney day exactly right for our family. We hit it hard right at the start, found more opportunities to chill and relax throughout the rest of the day, and chose a time of year to come that allowed us to get on rides without too much waiting. It was quite a Mary Poppins day (practically perfect in every way)!

I would love to hear about any tips you might have to have a lowkey awesome day at Disney that incorporates some basking, some chilling, and some soaking in of all that magic! Leave a comment with your ideas! And if you are looking for other vacation ideas, be it in the Orlando area or elsewhere, that you can feel confident are good choices for the entire family, take a look at these top picks for sober travel destinations. I’ve reviewed the list and it’s got some really great cities you could explore that will be full of fun, but that you don’t have to worry will be too wild for the kiddos!

Filed Under: General ·

LEGOLAND Florida: Tips for Finding Educational Opportunities During Your Visit

December 29, 2017 · by Tiffany Merritt · Leave a Comment

Thanks to LEGOLAND Florida for providing complimentary park tickets. As always, all thoughts and opinions are my own.

We recently visited LEGOLAND Florida for the first time, and since we were attempting to have some official homeschool days while we were on our vacation, I planned for our day at LEGOLAND to count. So how, exactly, does one count a day filled with fun rides as an educational experience? Well, at LEGOLAND, it’s actually quite easy! Here are my top tips for filling your day with learning opportunities at LEGOLAND Florida.

homeschool at LEGOLAND Florida

  1. The Imagination Zone

My very top recommendation for families who want their LEGOLAND experience to be educational is to head straight to Imagination Zone (here’s a link to the park map so you can see where it is in the park). In this area you can head to a help desk where you can get signed up for a LEGO Mindstorm experience. This was one of our favorite things that we did all day! During our hour long experience, our girls were taught how to build and program prototypes for Mars rovers. The instructor was completely in character as a nerdy and exciting space engineer and he quickly got all the kids to take their missions very seriously. He counseled them throughout the process and also helped them feel confident in their own abilities to work through challenges. I thought this experience was top notch and I would strongly suggest that you not miss it. My understanding is that you do need to head over to this area early in the day to get signed up for an available spot, as sessions happen throughout the day and slots do fill up quickly on higher crowd days. I believe the minimum recommended age for this experience is 6.

2. Communication Skills Through Trading Minifigs

legoland florida trading minifigs

Every single employee at the park has a minifig attached to his or her name tag, and that minifig is available to trade for one you have. All you have to do is ask! I would encourage you to bring around 10 minifigs at a minimum (I ordered some through eBay!), and to give your kids plenty of practice throughout the day approaching someone, making eye contact, and initiating a conversation. Being able to speak to someone is a critical life skill, and one that so many kids (and let’s be honest, young adults) seem to struggle with since we do so much of our communicating via the internet and text messages. But trading minifigs requires some old fashioned one-on-one talking, and it’s a great confidence builder for kids. My girls were initially quite nervous about having to do this, but the desire to trade minifigs outweighed the fear, and by the end of the day, they were quite comfortable approaching someone! Pro tip: we found that LEGOLAND employees at cash registers inside shops often had larger assortments of minifigs that they could trade!

3. Marvel at the Master Builders

legoland florida sculptures

LEGOLAND Florida has the most incredible sculptures that master builders have created, and they are pretty much everywhere you look throughout the park. Give your kids time and space to sit back and admire these works of art that came together, brick by brick. Then talk with them about the power of combining creative ideas with construction know how, and how much hard work and dedication went into each and every piece. Perhaps one of the best places to talk about the power of hard work and determination is by walking through LEGO Miniland, which showcases several different cityscapes, not to mention insanely awesome replicas of many different Star Wars locations and scenes. Take your kids to this area and really let it sink in for them that ultimately, they are only limited by their imaginations and by how hard they are willing to work for their dreams!

4. Driving School

legoland junior driving school

If your kids are 9 and younger, I would also really recommend the driving schools available (the junior school is for ages 3-5, I believe, and the other driving school is for ages 6 and up). Both of my girls really enjoyed getting to experience the independence of fully driving a car themselves (no tracks!) and my older child seemed to enjoy the challenge of needing to obey traffic rules, too. What a great learning experience!

5. Go on a Monday During the School Year

My final tip has to do with WHEN you should go to LEGOLAND, because the crowd size is definitely going to affect just how many things you can do. We went to LEGOLAND Florida on the Monday after Thanksgiving and while I know this is going to sound like hyperbole, it honestly was the most amazing theme park day I have ever had in my entire life. The reason (other than the fact that LEGOLAND is super fun, obviously) is that the crowd size was SUPER low. We were told that their estimated crowd for the day was 1,500. I don’t know if they hit that or not, but I can’t imagine that it was more. We never (no, not even once!) waited in line to ride anything!!! It honestly was like getting to live out the fantasy of having a theme park entirely to yourself, only there were enough other people around so that it didn’t feel downright spooky. I asked an employee if this was a bizarre fluke that just happens right after a big holiday, and that employee told me that pretty much any Monday that schools are in session is a pretty good day to come to LEGOLAND. So definitely go on a Monday during the school year if at all possible, because it is going to allow you so much more time to hit all the “pure fun” rides and experiences, and also leave you plenty of time for learning (and time for building in the Imagination Zone!). We made some really great memories at LEGOLAND Florida and we hope to travel back there sometime in 2018 to do more playing and more building with the folks there! It was a homeschool day for the books!

how to do legoland florida like a pro

Filed Under: Fun Things To Do ·

  • « Previous Page
  • 1
  • …
  • 22
  • 23
  • 24
  • 25
  • 26
  • …
  • 326
  • Next Page »

Connect

  • Email
  • Facebook
  • Instagram
  • Pinterest
  • Twitter

Welcome!


Grab your beverage of choice (mine is iced coffee) and let's hang out for a spell! I'm Tiffany, and I've rambunctious little girls and a fierce desire to share any tip and trick I can find to make lives with little ones a bit less hectic and a lot more fun. [Read more...]

Popular Posts

Keep Slowing Down. You’ve Got a Race to Lose

Keep Slowing Down. You’ve Got a Race to Lose

Free Summer School for Moms (You’ll Love It!)

Free Summer School for Moms (You’ll Love It!)

The Best Cheap Mattress is Also The Best Quality Mattress: A Must-Read

The Best Cheap Mattress is Also The Best Quality Mattress: A Must-Read

25+ Moana-Inspired Easter Basket Ideas

25+ Moana-Inspired Easter Basket Ideas

The Book Every Child Should Own (And How to Get a Free Copy )

The Book Every Child Should Own (And How to Get a Free Copy )

Recent Posts

  • Choosing an Engagement Ring in a Changing Landscape
  • Personalized Clothing in Family Portraits: Showcasing Unique Style
  • The Psychology of Dual-Monitor Productivity: Why It Feels Easier to Work
  • The Secret to Style Confidence – Even During the Messiest Days
  • The Science of Healthy Hair: Foundations, Care, and Everyday Styling

Search

Sponsors

Copyright © 2026 | Innovative by The Pixelista | Built on the Genesis Framework


Loading Comments...