• Home
  • About Me
  • Policies
  • Work with Me
  • Guest Posting
Stuff Parents Need

Stuff Parents Need

Easing the chaos in the nest, one find at a time.

  • Style
  • Parenting
  • Giveaways
  • The Kitchen
  • DIY Projects
  • Fun Things To Do
  • My Favorite Finds

Set it and Forget It: 16 Yummy Chicken Soups for the Slow Cooker

October 20, 2014 · by Tiffany Merritt · Leave a Comment

Thanks to Foodie.com for partnering with me to develop this yummy collection of chicken recipes. As always, all thoughts and opinions are my own! 

Earlier today I threw together an insanely good chicken soup all thanks to some leftovers I had on hand. I had some shredded chicken and black beans in the fridge, and some homemade veggie stock in the freezer that needed to get used up soon or else get tossed. I put those items together, along with a little salsa, a little frozen corn, a handful of rice and a pinch of cumin. I let is simmer for about 45 minutes; it was just perfect for this beautiful fall weather we are enjoying here in Chattanooga.

Soups really are an incredible meal option because they can come together so easily. I especially love making soups in the slow cooker, and I find it to be a really great way to cook chicken, which can dry out pretty easily (but not in a slow cooker!). So today I put together a great list of 16 slow cooker soups that all make use of chicken in some form. I hope it provides some inspiration for your lunch or dinner table in the coming weeks. It doesn’t have to be hard to be tasty! 🙂 Check it out and save anything that looks delicious to you!

Check out 16 Cozy Chicken Soups for the Slow Cooker

by Tiffany at Foodie.com

Filed Under: The Kitchen · Tagged: chicken soup, chicken soup recipe, recipes, slow cooker, slow cooker chicken recipes, slow cooker chicken soup, slow cooker chicken soup recipes, slow cooker recipes

Stuffed Bell Peppers Recipe (and How to Cook Brown Rice in 10 Minutes!)

October 8, 2014 · by Tiffany Merritt · Leave a Comment

Tracking Pixel

This is a sponsored post written by me on behalf Success® Rice. All thoughts and opinions are my own, as always. I hope you enjoy the stuffed bell peppers recipe! 

Am I the only one out there who still struggles to cook brown rice? Surely not! My kitchen is simply too small to allow for a rice cooker (or really most any device that only serves one purpose). And if I forget to think about the rice until 15 minutes before dinner, I’m in trouble, as I find that brown rice takes 45-50 minutes to be ready from the time I first put water in the pot.

I grew up eating , which is why I honestly thought that rice took 10 minutes to cook, all the time, always. My family tries hard to eat brown rice most of the time, though it is not unusual for me to think about starting to make the once it is too late to get the brown rice done, and so we eat white rice by default since it’s faster.

But now there’s Success® Whole Grain Brown Rice, and all is right with the rice world, once again. I can now make brown rice for my family in 10 minutes!

I’ve even put together a really beautiful and yummy stuffed bell peppers dish that ordinarily would have taken close to an hour and a half to make, and now can be finished in about 40 minutes, thanks to Success® Whole Grain Brown Rice.

stuffed bell peppers recipe 1

If you are looking for a dinner idea that is pleasing to the eye, healthy, delicious, and surprisingly fast, look no further.

Quick Stuffed Bell Peppers with Brown Rice

stuffed bell peppers recipe 7

Ingredients

  • 6 bell peppers, colors of your choice (orange and yellow are my favorites!)
  • 1 lb ground turkey
  • 1 Tbsp meat seasoning of your choice (for example: cumin, chili powder, garlic powder, fajita seasoning)
  • 1 package Success® Whole Grain Brown Rice
  • 1 cup salsa
  • 1 cup shredded Mexican blend cheese, plus extra

Directions:

1. Begin heating up water and a bag of Success® Whole Grain Brown Rice on the stove, following package directions (the package also gives instructions for microwave cooking, if you prefer that method). I opted to heat up 2 bags at once so that I could use the second bag for a different recipe, but you only need 1 for this recipe. When your rice is finished cooking, simply drain in the bag, and then carefully cut the top and remove it. Your rice will be cooked to perfection! 🙂

stuffed bell peppers recipe 6

2. While your rice is cooking, on a second burner heat water in a large pot. Salt it and put a lid on it so it will boil faster. Meanwhile, begin cutting the tops out of your bell peppers, removing the seeds and the white pith from the insides.

stuffed bell peppers recipe 4

3. Preheat the oven to 375 degrees.

4. Once the pot of water is boiling, add your bell peppers and put the lid  back on. Cook for 5 minutes. Drain, and place back in the baking dish. Be VERY careful, as they will be quite hot. Also be sure to get the water out from the inside of the bell peppers.

5. Heat a skillet over medium-high heat. Once it is hot enough, add ground turkey and the spices of your choice. I used a fajita blend from Mrs. Dash, but many spice blends will do nicely. Once the meat is heated through, drain off any fat and then add rice, salsa and 1 cup of cheese.

stuffed bell peppers recipe 5

Now it’s time to stuff those peppers! You should have enough filled to completely fill the insides of each pepper.

stuffed bell peppers recipe 3

Now top each one with just a bit of extra cheese, and pop them in the oven, uncovered, for 20 minutes. The end result is delicious!

stuffed bell peppers recipe 2

I love how easy Success® Rice made putting this dish together. Without it, I would have had to wait 45 minutes or so for the brown rice to be ready before putting the filling together. I also love that I could use brown rice in this dish, which is so good for your body, without having to spend any more time in the kitchen than I would have making white rice.

Over 300 Recipes!

I hope the stuffed bell peppers recipe makes its way to your dinner table in the near future. If you want more ideas,  has over 300 recipes for you to help you get breakfast, lunch or dinner on the table quickly.  It’s a terrific place to go and get some new, quick dishes. You can also find great recipe inspirations, lifestyle tips and more by following Success Rice on Facebook and Pinterest.

Sweepstakes Alert!

Success® Rice is excited to be part of your home, and to help you get in and out of the kitchen faster. They are a participating brand in the over at O, The Oprah Magazine. They have a nice variety of culinary-themed prizes, so it’s definitely worth a few minutes of your time to get entered. Somebody’s going to win, so it might as well be you!

This is a sponsored post written by me on behalf Success® Rice.

Filed Under: The Kitchen · Tagged: brown rice, brown rice recipes, quick brown rice, quick stuffed bell peppers with brown rice, recipes, stuffed bell pepper recipe, stuffed bell peppers, stuffed bell peppers recipe, success rice

Spooky Orange Cream Cinnamon Rolls with TruMoo Orange Scream Milk

October 6, 2014 · by Tiffany Merritt · 6 Comments

This post brought to you by TruMoo. All opinions are 100% mine.

 photo TruMooHALLOWEENOrangeLogo-1_zps3ce13877.jpg

We cooked up something frighteningly delicious for Sunday brunch this past weekend, all inspired by the special edition product in dairy cases across the country right now:  TruMoo Orange Scream Milk. Have you seen it?

 photo trumooorange1_zps1bdf27f7.jpg

I thought it served as a great tool for making something extra special for a chilly October morning. We came up with the idea of doing Orange Cream Cinnamon Rolls, and I’d love to show you how to make them!

 photo trumooorange17_zps32474d4d.jpg

Ingredients:

Dough

  • 1 package dry active yeast
  • 3/4 cup TruMoo Orange Scream Milk, room temperature or slightly warmed
  • 1 stick of butter at room temperature
  • 1/4 cup sugar
  • 2 tsp vanilla
  • 4 cups flour
  • 1/2 tsp salt
  • 1/2 tsp cinnamon
  • 2 eggs, room temperature

Filling

  • 1 cup brown sugar
  • 1 Tbsp cinnamon
  • 1/2 stick butter at room temperature
  • 1 tsp TruMoo Orange Scream Milk

Icing

  • Half a stick (4 oz) cream cheese at room temperature
  • 2 Tbsp TruMoo Orange Scream Milk
  • 1 cup powdered sugar
  • orange sprinkles (optional)

Directions:

 photo trumooorange2_zps58498c79.jpg

Add 3/4 cup TruMoo milk to a mixing bowl.

 photo trumoo3_zps6fbd02ea.jpg

Add yeast to the milk, give it a stir, and allow it to sit for 2 minutes.

 photo trumooorange4_zps82ac5585.jpg

Slowly add in the butter, sugar, vanilla, 1 cup of flour, cinnamon and salt, and combine using a mixer.

 photo trumooorange5_zps980f1100.jpg

Once this mix is just combined, add the eggs.

 photo trumooorange6_zps19dcaabb.jpg

Now it’s time to add the remaining flour and beat until well combined.

 photo trumooorange7_zps253aa432.jpg

The dough needs to be kneaded (and hey, don’t we all??? Heh heh..) for 5 minutes. If you are fancy and have a stand mixer, get out your dough blade. If you are like me, and do NOT have such fancy equipment, get out your flour and lightly flour a surface, and then get to work. Or in my case, put your husband to work.

 photo trumooorange9_zps3cfd685b.jpg

Smear some butter on the bowl you were using, and then place your kneaded dough back in that bowl. Roll it around a bit so that some butter gets all over it. Then put plastic wrap on top, and put the bowl somewhere warmish to sit for an hour. We actually put it in the sink it a bit of warm water. Yes, you really do need to let it sit for that long. And yes, it is torture.

BUT! While you are waiting you should learn more about TruMoo! visit their website for more delicious TruMoo Halloween recipes. You’ll find plenty of other ideas for ways to use your Orange Scream Milk. Or you could just have a glass; it’s awesome, trust me.

 photo trumooorange10_zpsc930711a.jpg

While you are waiting, you should also get started on the cinnamon roll filling. Combine all the filling ingredients in a bowl and mix together until well-combined.

 photo trumooorange13_zps4f1b07d0.jpg

Now that an hour has passed, get your dough back out on a lightly floured surface and roll it out into roughly the shape of your 9×13 baking dish (a little bit larger is ok).

 photo trumooorange14_zpsfba62c6c.jpg

Now add that yummy filling you made a short while ago and sprinkly it evenly all over the dough. Roll the dough on the long end of the rectangle you made (you want your roll to be long). Roll it tightly, and then cut into 12 pieces.

 photo trumoocinnamonrolls1_zps3eaf857d.jpg

I cut the roll in half, and then cut each half again, and then took each section and made 3 rolls, for a total of 12. Place these in your 9×13 baking dish, and be sure to butter the dish first. Cover it again with plastic wrap. Let it rise, once again, for an hour. I KNOW….THIS PART STINKS!

While you wait, might was well browse the TruMoo Pinterest boards! They have some terrific ideas for you to pin. You can also check out the TruMoo Facebook page. I like connecting with the brand here because they have fun giveaways that pop up from time to time!

While you are waiting, you should also go ahead and preheat your oven to 350, though it will only take it 5-10 minutes to get that hot.

Once you time is up, remove the plastic wrap and put your cinnamon rolls in the oven for 30 minutes. They should look something like this when they are ready:

 photo trumooorange16_zps2556db80.jpg

Give them a little bit of time to cool down so that your icing doesn’t melt too fast. Once you just can’t stand the wait any more, apply the icing liberally to your rolls, and for extra color, add some orange sprinkles.Dig in, and enjoy! They are SO yum!

 photo trumooorange19_zpsd6c66b10.jpg

Visit Sponsor's Site

Filed Under: The Kitchen · Tagged: cinnamon roll recipes, cinnamon rolls recipe, orange cinnamon rolls, orange cream cinnamon rolls, orange cream icing, orange truemoo, recipe, recipes, truemoo, truemoo orange scream

After School Snacks: 12 Great Ideas!

August 28, 2014 · by Tiffany Merritt · 3 Comments

Thanks to Foodie.com for partnering with me today to form this curated collection of AWESOME school lunch recipes! All thoughts and opinions are my own, as always.

Check out After School Noshing

by Tiffany at Foodie.com

We’ve been back at school for a week and a half, and we are starting to get in our lunch groove, which is good. But we haven’t figured out this after school snack business AT ALL. It only make sense that my child would be hungry after 7 hours of work and play, but I have NO plan for what to offer her that will give her a boost but not spoil her dinner (especially since we have dinner at 5…we’re bringing early bird back, friends).

So check out my 12 ideas for simple and good snacks on Foodie. Then let me know what you are serving up because I could use some more ideas!

Filed Under: The Kitchen · Tagged: after school snack, after school snack ideas, after school snacks, foodie, healthy snack ideas, recipes, snack ideas, snack ideas for kids

How to Make 20 Meals in 1 Afternoon (That Taste GREAT!!!)

August 12, 2014 · by Tiffany Merritt · 2 Comments

So excited to have my good friend Karen from 365 Days of Slow Cooking on the site today. She’s got a GREAT ebook that’s just launched and that will cost you less than a cup of coffee at Starbucks and save you hours! I’m about to buy a copy right now, myself!

What would you say if I told you that you could give up a Saturday afternoon in exchange for 20 crockpot freezer meals that would get you through each weekday for an entire month?  If you are a busy working parent or even a stay-at-home parent like me I know that you would say “YES!”  

20 freezer crockpot meals all put together in under 3 hours.  Perfect for a busy, working parent!  #crockpotfreezermeals

One of my favorite things about the slow cooker is that dinner is prepared early in the day and it frees up my mind.  I don’t have to think, “What are we going to have for dinner tonight” all day long.  What is even better than a crockpot meal is a freezer crockpot meal.  All the thinking and prepping is already done.

I love to go to my freezer, pick out a meal, plop it in my slow cooker and turn it on.  This routine is especially appreciated on busy mornings or for busy working parents that won’t get home until 6 pm but still want a home cooked meal.
crockpot sloppy joe quesadillas as seen in from Freezer to Crock to Table e-book

The prep work and grocery lists and figuring out how to make freezer meals happen can sometimes be totally overwhelming.  That’s why I’ve put together my e-book, From Freezer to Crock to Table.  It provides a grocery list, clear instructions and assembly line-style prep that is super easy to follow.

There are 10 recipes and each one is made 2 times each…you’ll end up
with 20 meals that will fit nicely into your freezer.  Each recipe serves about 4 people.  If you have a large family you may want toput 2 duplicate freezer meals into a large slow cooker.  That way you’ll have enough for 8 people.  I would suggest eating these meals within 3 months for best results.
The meals that are in my ebook are:
  • Beef Stroganoff
  • Sloppy Joe Quesadillas
  • Beef Gyros with Tzatziki Sauce
  • Café Rio Chicken
  • Shredded BBQ Chicken
  • Asian Chicken
  • Garlic Pepper Sauce
  • Hoisin Pork Sliders
  • Tomato Basil Parmesan Soup
  • Cream Cheese Chicken Enchilada Soup
Sound good???

If you’d like to get all the recipes and the instructions on how to put the meals together in 2 1/2 hours you can purchase the e-book “From Freezer to Crock to Table” for only $1.99! Click here to purchase.

Filed Under: The Kitchen · Tagged: 365 days of slow cooking, crock pot, crock pot meals, crockpot freezer meals, easy crockpot meals, freezer crockpot meals recipes, from freezer to crock to table, recipes

Healthy Cookie Dough Recipe (Perfect for School Lunches!)

July 26, 2014 · by Tiffany Merritt · 71 Comments

Affiliate links may be included. I only promote what makes me smile! 

I’m up to my eyeballs in recipe gathering so that I can be prepared when school starts in a few weeks and I have to start packing school lunches. I need ideas that are on the healthy end of the spectrum, that don’t have to be refrigerated, and that don’t require me to cut food into ridiculous shapes and give every item edible smiley faces (no disrespect to you bento wizards, out there. Rock on with your bad selves).

So when I came across a recipe for “faux cookie dough” that used chickpeas, of all things, as the primary ingredient, I knew it was so bizarre that I just had to try it.

And it was a BIG hit, friends!

healthy cookie dough

It may be a stretch to call this recipe “healthy” on account of all the brown sugar in it, but it’s definitely fair to say that this is a more sensible choice, and certainly a safer choice than cookie dough. And just think of all the protein you are getting, too!

Healthy Cookie Dough

(recipe adapted from Family Fun, April 2014 edition)

Ingredients:

  • (1) 15 1/2 oz can chickpeas, drained and rinsed
  • 6 Tbsp brown sugar
  • 1/4 cup peanut butter
  • 3 Tbsp old fashioned oats
  • 1 Tbsp milk
  • 2 tsp vanilla
  • 1/8 tsp salt
  • 1/3 cup chocolate chips (try Enjoy Life brand, my FAVORITE…and they are dairy and soy free!)
  • 1/8 tsp baking soda

In a food processor, combine all ingredients except chocolate chips. Blend until smooth, stopping occasionally to scrape down the sides (the entire blending and scraping session took me around 2 minutes). Remove the mixture from the food processor and place in a serving bowl (I like to do individual ramekins so everyone can have their own!). Gently fold in the chocolate chips.

Serve with graham crackers, apple slices, or just a spoon!

healthy cookie dough recipe

Y’all, it sounds so darn weird, but my kids TORE IT UP. And they were positively giddy that I was letting them go to town on cookie dough! Even Tim thought it was actual cookie dough when he tried it. He was very impressed and asked if we could make it a regular snack option.

I’m definitely hanging on to this one; what a great special treat for school lunches or as an after-school snack! Let me know if you try it, ok? And if you’d like to try a dip recipe that is more savory, but that is equally bizarre-sounding (though also a winner!), then you should try the pumpkin curry bean dip!


Filed Under: The Kitchen · Tagged: chickpea cookie dough, faux cookie dough, garbanzo bean cookie dough, healthy cookie dough, healthy cookie dough recipe, recipes

Blueberry Kefir Overnight Oatmeal: Super Easy Superfood

July 21, 2014 · by Tiffany Merritt · 20 Comments

 This shop showcasing #KefirCreations has been compensated by #CollectiveBias, Inc. and its advertiser. All opinions are mine alone.

Ready or not, it’s time to start thinking about back-to-school, and for me, that means finding some good ideas for quick and easy lunch box fillers. It also means looking for ways to get the morning started right for my girls with breakfasts that pack a nutritional punch without causing me to spend all morning in the kitchen. I’ve been thinking a lot about what I might be able to do with Lifeway Kefir, especially since my girls LOVE it and drink it several times a week, already.

Well friends, I’m pleased to tell you that I came up with an idea that has just 4 ingredients, and only requires a bit of mixing and some hang out time in the fridge. Best of all, every single ingredient is not just good, but AWESOME for you.

blueberry overnight oats

What is Kefir?

Have you seen this product in the stores, yet? It’s fairly new to mainstream American grocery stores, but its hardly new at all, having origins that date back 2,000 years!

lifeway kefir bottle

It’s called kefir and it’s a cultured milk drink loaded with 12 live and active probiotic cultures, which your tummy will thank you for because they help balance digestive health, as well as support your immune system. Lifeway Kefir is 99% lactose free and comes from cows that are not treated with pesticides, antibiotics or synthetic growth hormones. This is also a GMO-free product!

While it isn’t the same as yogurt, some people find it to taste similar to yogurt, though it is much runnier in its consistency, and therefore, drinkable. We use it all the time in our smoothies, and we also drink it by the glass. But this is our first time trying it as a component in oatmeal, and it worked out beautifully!

Here’s the recipe so you can try Blueberry Kefir Overnight Oatmeal yourself! And don’t forget to snag a coupon before heading out to the store!

lifeway kefir recipe 1

Ingredients:

  • 2 cups Lifeway Blueberry Kefir
  • 1 cup old-fashioned oats
  • 2 Tbsp chia seeds
  • 1 cup blueberries

Start by pouring your oats into a mixing bowl.

lifeway kefir recipe oats

Now add your Lifeway Kefir.

lifeway kefir added to oats

Time to add the chia seeds! I know chia seeds aren’t readily available at every grocery store, but it’s worth taking that little bit of extra time to find them (hint…they are on Amazon!). Why? Because they are pretty much one of the most nutritionally awesome foods on the entire planet. The amount of chia seeds in this recipe provides 12 grams of fiber, 6 grams of protein and 5.8 grams of Omega-3 fatty acids. BOOM!

lifeway kefir recipe chia seeds

Ok, now it’s time to add those beautiful blueberries. The antioxidants found in blueberries are huge, friends. Just one more reason to love this recipe! Gently fold them in so that they don’t get squished. If blueberries are out of season you can always go for frozen or dried blueberries.

lifeway kefir recipe blueberries

All you need to do now is transfer them to a container with a lid (I chose a mason jar to save space, but do whatever works for you) and let it sit in the refrigerator overnight, or for a minimum of 6 hours. That’s it!

lifeway kefir recipe oatmeal

I personally prefer this version of oatmeal cold, but my daughter likes it warmed up, more like a traditional hot breakfast. Try it for yourself to see which way you like it, best! My husband thinks it tastes better with a swirl of honey on top, and I think it is perfect just the way it is, as the kefir adds that yummy tart flavor. It pretty much couldn’t be easier (as long as you remember to put it together the night before) and it leaves you feeling full and happy!

Need more breakfast ideas? Here are some more of my favorites

kiwi bread St. Patrick's Day breakfast

Kiwi Bread

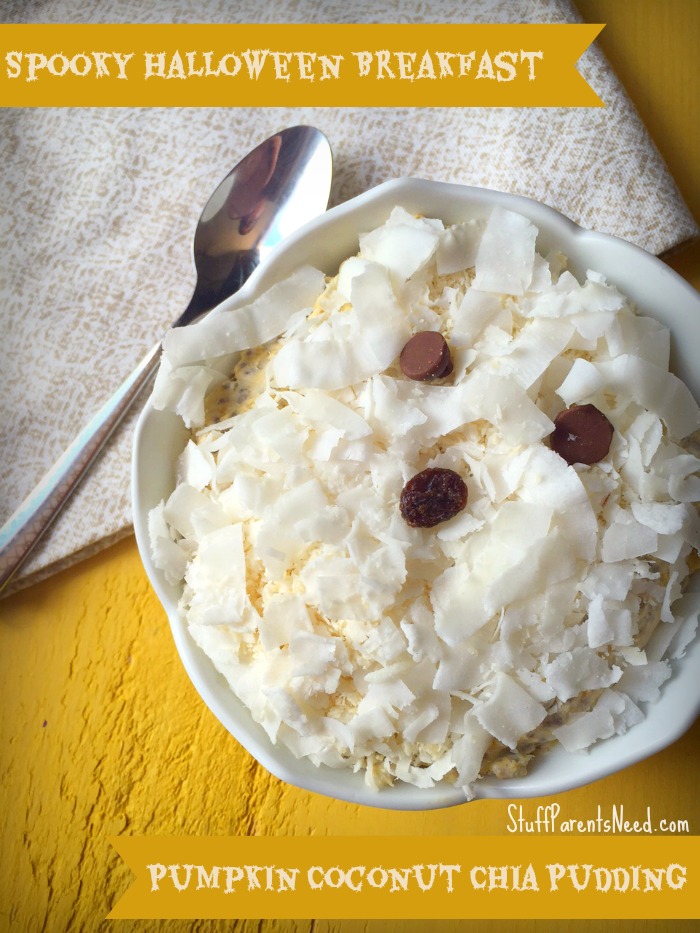
pumpkin chia pudding

Pumpkin Chia Pudding

goji and raspberry smoothie bowl with muesli topping

Smoothie Bowl


Filed Under: The Kitchen · Tagged: blueberry kefir overnight oatmeal, kefir, lifeway kefir, lifeway kefir coupons, lifeway kefir review, overnight oatmeal recipe, recipes, superfood

Chocolate Banana Pudding with TruMoo

July 17, 2014 · by Tiffany Merritt · 126 Comments

This post brought to you by TruMoo. All opinions are 100% mine.

Yesterday I made a special treat for you all! I decided to make a banana pudding, but I wanted to make it even better than a traditional banana pudding.

I know what you are thinking: “Banana pudding does not need any improvements, Tiffany!” I hear you. Banana pudding is totally amazing. But CHOCOLATE Banana pudding is even more amazing, promise. I made mine with TruMoo Chocolate Milk. Have you seen it in stores? I’m a big fan, especially since it’s got no artificial growth hormones. Check out TruMoo for more information

 photo trumoo2_zpsa934d405.jpg

And even though it doesn’t look super duper chocolately in its finished form, the color has been diluted with whipped topping and condensed milk. But there’s also chocolate pudding made with TruMoo chocolate milk, which basically makes it double chocolate pudding. So I’m thinking right about now you’d like to learn the recipe, yes? Ok, let’s do it!

Ingredients

for chocolate pudding

  • 1/4 cup baking cocoa
  • 1/2 cup sugar
  • 2 Tbsp cornstarch
  • 1/4 tsp salt
  • 2 cups TruMoo chocolate milk
  • 1 Tbsp butter
  • 1/2 tsp vanilla extract

Other Ingredients:

  • 1 (14 ounce) can sweetened condensed milk
  • 1 Tbsp vanilla extract
  • 1 (12 ounce) container frozen whipped topping, thawed
  • 1 package of vanilla wafers, crushed
  • 4 medium bananas, sliced to desired thinness

 photo trumoo13_zps0ab1ae82.jpg

To make the chocolate pudding:

 photo trumoo12_zpsb55a968c.jpg

In a saucepan on medium heat, combine cocoa, sugar, cornstarch and salt. Add TruMoo Chocolate milk, roughly 1/2 cup at a time and stir until well combined after each addition.

 photo trumoo11_zpsd3abfe40.jpg

Once all the milk is added, bring to a gentle boil (still over medium heat).

 photo trumoo10_zps31457fbc.jpg

Let the mixture boil gently while constantly stirring for about 2 minutes. Then add the butter and vanilla and remove from the heat. Allow to cool down to room temperature (this will take 20 minutes or so, and goes faster if you give it a stir every few minutes).

Next add the condensed milk to the chocolate pudding mixture. Stir it well until it is throughly combined.

 photo trumoo9_zpsa75f48ff.jpg

Now it’s time to fold in the whipped topping!

 photo trumoo7_zpscd4c379f.jpg

The finished mixture should look something like this:

 photo trumoo6_zps4f290fa3.jpg

The next part of the recipe was totally my favorite because it involves getting out your aggression. Poor vanilla wafers never saw it coming. Crush as many as you think reasonable at a time, but I can tell you that putting the entire bag of wafers in a quart bag at one time is over shooting. Just trust me on that one ;-).

 photo trumoo5_zps980ee036.jpg

I guess I should explain why the wafers are crushed instead of getting artfully arranged. Well, for starters, I don’t “artfully arrange” anything well as you’ll see in a second when you see the final product. But more importantly, I honestly think banana pudding is better this way because the crumbly goodness of the wafers is much more evenly distributed. Try it and let me know if you agree!

Ok, so back to the recipe. It’s time to get your layer on! Start with a layer of crushed wafers, followed by a layer of bananas.

 photo trumoo4_zpsfeb7f4b1.jpg

Now add a layer of that awesome pudding you just made! I got a total of 4 layers of wafers/bananas and 3 layers of pudding. This isn’t an exact science, so it’s ok if yours doesn’t turn out like mine. And most likely, yours will definitely turn out prettier than mine! Layers are just not my thing, y’all.

 photo trumoo3_zpsf2677b13.jpg

So while it isn’t the most beautiful pudding in the world, it can hold its own in the taste department, and I think a lot of that has to do with the inclusion of TruMoo Chocolate Milk! I hope you will give the recipe a try; my crew has been thoroughly enjoying it as a special treat after dinner (and yeah, after lunch, too. Can you blame us?!).

Want more ideas for how to use TruMoo to make super yummy recipes like this one? Check out TruMoo on Facebook  and join the community there to get more ideas, and to even hear about great promotions.

chocolate banana pudding


Visit Sponsor's Site

Filed Under: Giveaways, The Kitchen · Tagged: banana pudding recipes, chocolate banana pudding, chocolate banana pudding recipe, chocolate milk, giveaway, recipes, review, truemoo, truemoo chocolate milk

Upgrade Your Breakfast: Pumpkin and Goat Cheese Bagel with Sweet Bacon Topping

June 30, 2014 · by Tiffany Merritt · 2 Comments

This post brought to you by LIBBY’S Pumpkin. All opinions are 100% mine.

By now you have seen several examples on my blog of what #PumpkinCan do in your kitchen. It is an amazingly versatile super food that doesn’t need to be limited to a certain season of the year, nor does it need to be limited to desserts or sweet breads. I’ve shown you how to make curried pumpkin dip for a mid-afternoon snack, twice-baked potatoes with pumpkin for a sensational side dish at dinner, and I’ve showcased pumpkin energy squares, which are perfect for any time of day when you need a little boost.

And today I’ve got one seriously fancy way to dress up your bagel at breakfast. I surprised my family with this on a weekday morning and it put everyone in a great mood, because it felt like such a special treat (but it was SO easy to make! They don’t need to know that!).

 photo pumpkinandgoatcheesebagel1_zpsbf355fd3.jpg

Pumpkin and Goat Cheese Bagel with Sweet Bacon

Ingredients:

  • 2 bagels, sliced into 4 halves
  • 4 slices of bacon, cooked and crumbled
  • 1/3 cup of LIBBY’S 100% Pure Pumpkin
  • 1/3 cup goat cheese
  • 1 Tbsp maple syrup
  • 1 Tbsp powdered sugar (optional)

Begin the process by cooking your bacon. I personally cook bacon in the oven (line a baking sheet with raised edges with foil, placed no more than 8 sliced on each tray, and bake at 400 degrees for 15-20 minutes). The end result is glorious and I don’t have to stand over a stove having bacon grease leaping out of the pan onto me. Everybody wins!

 photo pumpkinbagelbacon_zps911b5662.jpg

While your bacon is cooking, put together the pumpkin spread for the bagel. Simply add the goat cheese, LIBBY’S 100% Pure Pumpkin and maple syrup in a bowl and mix until well-combined. I mixed it by hand, but you could also use a mixer to make faster work of it.

 photo pumpkinbagelingredientbowl_zps220d34dc.jpg

All that’s left to do is to toast your bagels, apply the pumpkin-cheese spread, and then sprinkle bacon on top. I personally thought adding a sprinkle of powdered sugar on as a finishing touch was awesome (it made the bacon taste sweet!) but that’s an optional step. Bon appetite!

Be sure to take a moment to follow LIBBY’S Pumpkin on Twitter and tweet your favorite #PumpkinCan fact for a chance to win weekly prizes!

Visit Sponsor's Site

Filed Under: The Kitchen · Tagged: goat cheese recipes, pumpkin and goat cheese bagel with sweet bacon topping, pumpkin bagel recipe, pumpkin bagels, pumpkin goat cheese, pumpkin recipes, recipes

  • « Previous Page
  • 1
  • 2
  • 3
  • 4
  • 5
  • …
  • 10
  • Next Page »

Connect

  • Email
  • Facebook
  • Instagram
  • Pinterest
  • Twitter

Welcome!


Grab your beverage of choice (mine is iced coffee) and let's hang out for a spell! I'm Tiffany, and I've rambunctious little girls and a fierce desire to share any tip and trick I can find to make lives with little ones a bit less hectic and a lot more fun. [Read more...]

Popular Posts

Keep Slowing Down. You’ve Got a Race to Lose

Keep Slowing Down. You’ve Got a Race to Lose

Free Summer School for Moms (You’ll Love It!)

Free Summer School for Moms (You’ll Love It!)

The Best Cheap Mattress is Also The Best Quality Mattress: A Must-Read

The Best Cheap Mattress is Also The Best Quality Mattress: A Must-Read

25+ Moana-Inspired Easter Basket Ideas

25+ Moana-Inspired Easter Basket Ideas

The Book Every Child Should Own (And How to Get a Free Copy )

The Book Every Child Should Own (And How to Get a Free Copy )

Recent Posts

  • Choosing an Engagement Ring in a Changing Landscape
  • Personalized Clothing in Family Portraits: Showcasing Unique Style
  • The Psychology of Dual-Monitor Productivity: Why It Feels Easier to Work
  • The Secret to Style Confidence – Even During the Messiest Days
  • The Science of Healthy Hair: Foundations, Care, and Everyday Styling

Search

Sponsors

Copyright © 2026 | Innovative by The Pixelista | Built on the Genesis Framework


Loading Comments...